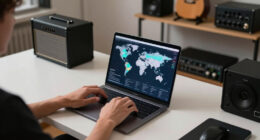
To build a home studio on a budget, start by choosing a quiet, clutter-free space with minimal outside noise. Use affordable acoustic treatments like foam tiles or DIY panels made from blankets or mattress toppers to reduce echo. Invest in a reliable but inexpensive microphone, audio interface, and good headphones. Utilize free or low-cost software and online tutorials to learn your craft. With resourcefulness, you’ll discover how to create a functional studio without overspending—exploring further can help maximize your setup.
Key Takeaways
- Choose a quiet, reflective space and use furniture, rugs, or curtains to naturally absorb sound.
- Prioritize affordable acoustic treatments like foam panels or DIY solutions at reflection points.
- Start with basic, budget-friendly recording equipment such as a decent microphone and reliable audio interface.
- Use free or low-cost DAWs and online tutorials to learn recording and mixing skills.
- Gradually upgrade equipment and improve acoustic treatment over time as your skills and budget grow.

Creating a home studio doesn’t have to break the bank. You can set up a space that sounds professional without spending a fortune. The key is to focus on smart choices, especially when it comes to acoustic treatment and budget recording equipment. These elements are indispensable for producing quality sound but don’t have to be expensive.
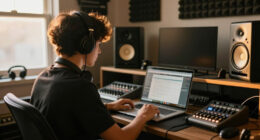
Start with your room. Pick a space that’s quiet and isolated from outside noise, ideally with fewer reflective surfaces. Once you’ve chosen the right spot, prioritize acoustic treatment. You don’t need pricey acoustic panels to improve your room’s sound. Simple, affordable solutions like foam tiles, bass traps, or even DIY panels made from thick blankets or mattresses can considerably reduce echo and improve sound clarity. Position these treatments at reflection points—where sound waves bounce off walls and ceilings—to absorb excessive reverberations. This step is essential because no matter how good your equipment is, poor acoustics will undermine your recordings. Understanding the importance of acoustic treatment can make a significant difference in your final sound quality.
Choose a quiet, reflective surface-free space and use DIY or affordable acoustic treatments to improve sound clarity.
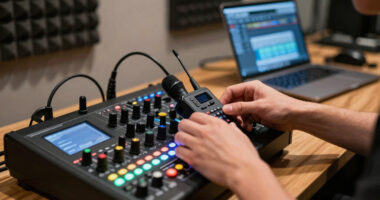
Next, look for budget recording equipment that fits your needs. A decent microphone is a must; you don’t have to buy the highest-end model right away. Many affordable condenser or dynamic microphones offer excellent sound quality for the price. Pair it with a basic audio interface, which serves as the bridge between your microphone and computer. You’ll find plenty of reliable, budget-friendly options that provide clear sound and reliable connectivity. Don’t forget to get a pair of good headphones—these are indispensable for accurate monitoring and mixing. You can find models that deliver professional sound without costing a fortune.
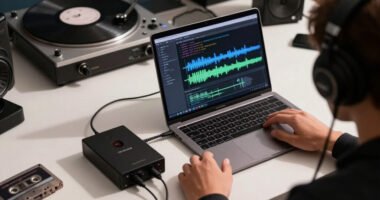
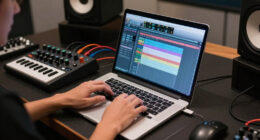
Software is another area where you can save money. There are many free or low-cost Digital Audio Workstations (DAWs) that are user-friendly and full-featured, perfect for beginners and intermediate users alike. Take advantage of tutorials online to learn the basics of recording, editing, and mixing. This way, you can maximize your equipment’s potential without hefty expenses.
Finally, get creative with your space. Use furniture, rugs, and curtains to dampen sound reflections naturally. Keep your setup organized and clutter-free to make recording sessions more efficient. As your skills grow, you can gradually upgrade individual components, but starting with the essentials ensures you don’t overspend initially. Building a home studio on a budget requires resourcefulness and research, but with careful planning, you’ll be surprised how good your recordings can sound without breaking the bank.
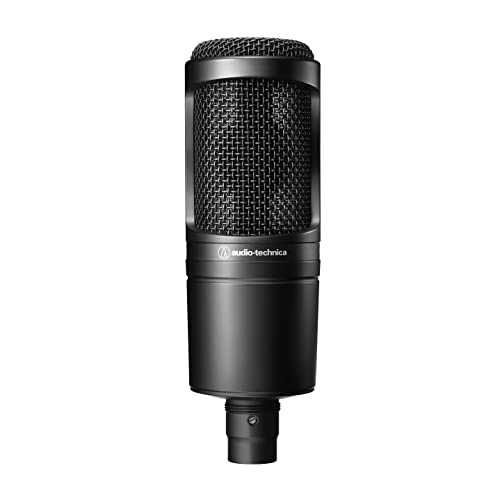
Audio-Technica AT2020 Cardioid Condenser Studio XLR Microphone, Ideal for Project/Home Studio Applications, Black
- Affordable Studio Condenser Microphone: Price/performance standard in studio mics
- Suitable for Home Projects: Ideal for project and home studios
- High SPL & Wide Dynamic Range: Handles high sound pressure levels
As an affiliate, we earn on qualifying purchases.
As an affiliate, we earn on qualifying purchases.
Frequently Asked Questions
How Can I Improve Acoustic Treatment Affordably?
You can improve acoustic treatment affordably by creating DIY panels using affordable materials like rockwool or fiberglass, which absorb sound effectively. Focus on foam placement in key areas such as corners and walls to reduce echoes. You don’t need expensive gear—just strategically positioned foam and DIY panels can substantially enhance your room’s acoustics, making your recordings clearer and more professional without breaking the bank.
What Are the Best Budget-Friendly Recording Software Options?
Imagine your studio as a ship steering vast seas; you need reliable sails to catch every breeze. For budget-friendly recording software, options like Audacity or Cakewalk provide the sturdy sails you need, offering DIY acoustics guidance and compatibility with budget speakers. These tools help you chart your course without sinking your budget, ensuring your sound reaches every corner of your creative ocean.
How Do I Choose Cost-Effective Microphones?
To choose cost-effective microphones, consider different microphone types like dynamic or condenser, which suit various recording needs and budgets. Look for budget brands known for quality, such as Audio-Technica or Rode, that offer reliable options without overspending. Read reviews and compare features to find a mic that fits your budget while delivering good sound quality. This way, you get a versatile microphone without sacrificing your financial limits.
What Lighting Solutions Work Well in a Home Studio?
You should consider DIY lighting solutions like affordable LED strip lights or clamp lamps with soft white bulbs to create even, adjustable illumination. Utilizing natural illumination by positioning your studio near windows can enhance your setup without extra cost. Combining these options allows you to customize your lighting, reduce shadows, and achieve a professional look without breaking the bank. Experiment with different setups to find what works best for your space.
How Can I Optimize Small Spaces for Sound Quality?
Imagine transforming your small room into a soundproofed sanctuary, where every inch is optimized for clarity. You can achieve this by applying soundproofing techniques like thick rugs, foam panels, and heavy curtains to absorb echoes. Carefully consider furniture placement—positioning your desk and equipment to minimize sound reflections. This strategic setup makes your space feel larger and improves sound quality, turning even tiny rooms into professional-sounding studios.

Focusrite Scarlett Solo 3rd Gen USB Audio Interface for Guitarists, Vocalists, Podcasters or Producers to record and playback studio quality sound
- High-Performance Mic Preamps: Bright, clear recordings with Air mode
- Instrument Inputs: High-headroom inputs for guitar and bass
- Clipping-Free Recording: Gain Halos prevent distortion
As an affiliate, we earn on qualifying purchases.
As an affiliate, we earn on qualifying purchases.
Conclusion
Creating a home studio on a budget is totally doable with some smart choices and creativity. Did you know that over 60% of musicians now record at home? With just a little investment and resourcefulness, you can produce professional-quality sound without breaking the bank. So, start small, prioritize your needs, and gradually upgrade your setup. Before long, you’ll be making music or content that sounds great and feels rewarding—without overspending.

OneOdio A71 Hi-Res Studio Recording Headphones – Wired Over Ear Headphones with SharePort, Monitoring Mixing Foldable Headset with Stereo Sound, 3.5/6.35MM Jack for PC Computer DJ Guitar-Black
- High-Resolution Sound: 40mm drivers deliver clear, detailed audio
- Comfortable Fit: Soft ear cushions and adjustable headband
- Versatile Connectivity: Includes 3.5mm and 6.35mm plugs with long coiled cord
As an affiliate, we earn on qualifying purchases.
As an affiliate, we earn on qualifying purchases.

Soon Global 8-Pack Acoustic Panels, Soundproof Wall Panels, 48 X 32 Inches Sound Absorbing Panels, Decorative Acoustical Wall Panels, Acoustic Treatment for Recording Studio, Harmony in Azure
- High-Density Sound Absorption: Reduces noise and improves sound quality
- Artistic Designer Panels: Features exclusive artist-curated designs
- Flame-Resistant Material: Made from safe, flame-resistant polyester fiber
As an affiliate, we earn on qualifying purchases.
As an affiliate, we earn on qualifying purchases.