TL;DR
Wireless microphone systems send audio from a microphone transmitter to a receiver over radio waves, so you can move without a cable. Reliable results depend on choosing the right mic style, checking local frequency rules, coordinating channels, placing antennas well, and testing in the actual venue.
At a school assembly, the first speaker steps away from the lectern—and the microphone goes silent. The receiver still glows, the audience still waits, and someone races toward the sound desk. That small moment shows why a wireless microphone is more than a cable-free mic: it is a radio link you need to plan and check.

Get audio and creator gear delivered free with Prime
- Fast, free delivery on millions of items
- Prime Video, Amazon Music and more included
- Member-only deals all year
Wireless microphone systems transmit a microphone’s audio to a receiver over radio waves, avoiding a cable between the performer and the sound system. They are widely used in live music, theaters, houses of worship, conferences, classrooms, broadcasting, and video production.
This guide explains what each part does, how to choose a handheld, lavalier, headset, or instrument system, and why range claims rarely tell the whole story. You’ll also get a practical setup routine for checking frequencies, batteries, sound levels, and a backup before your audience arrives.
A wireless system sends audio from a microphone transmitter to a receiver; the receiver still needs a connection to your mixer, camera, or recording device.
Match the mic style to the job: handheld for control, lavalier for discreet hands-free speech, headset for movement, and a suitable bodypack input for instrume…
Check current local frequency rules, scan at the venue, and coordinate channels before running several systems together.
Test range by walking the speaker’s actual route, and position antennas with the receiver’s placement guidance in mind.
Check battery status, set gain while listening at performance volume, and keep a wired mic or other practical fallback ready.
How a Wireless Microphone Sends Your Voice to the Sound System
A wireless microphone system captures sound at a microphone, sends it by radio from a transmitter, and turns it back into audio at a receiver. The receiver then feeds a mixer, camera, computer, or recording device. In practical terms, the transmitter is a small radio station devoted to one microphone.
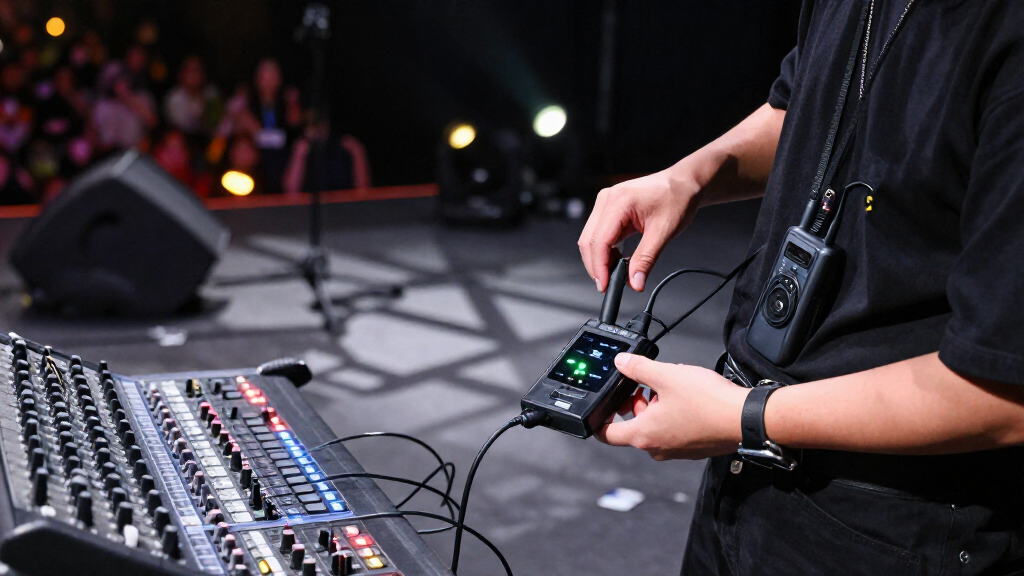
A typical setup includes a microphone, transmitter, receiver, antennas, batteries, and an audio cable from the receiver to your equipment. A handheld mic combines the capsule and transmitter in one unit. A lavalier or headset plugs into a bodypack transmitter, often clipped to a belt or slipped into a pocket.
For example, a presenter at a conference might wear a lavalier clipped to a lapel, with its thin cable tucked beneath a jacket and its bodypack at the waist. The receiver sits at the sound desk and connects to the mixer. The radio link replaces the long cable across the floor, while the receiver’s output cable still connects to the mixer.
The distinction matters when troubleshooting. If the receiver shows radio signal but the mixer gets no audio, check the receiver’s output cable, mute settings, and gain. A radio connection can be working even while the audio path after the receiver has failed.
Popular right now

Vitamix VX1 Professional-Grade Blender, 64 oz, Black

Ninja Foodi DualZone Smart XL Air Fryer, 10 Qt, 6-in-1, Black (DZ550)

eufy C28 Robot Vacuum and Mop for Pet Hair, 15,000 Pa
As an affiliate, we earn on qualifying purchases.
Pick the Microphone Style That Fits How You’ll Move
The best microphone style depends on what the speaker is doing: handheld mics give you control, lavaliers keep your hands free, headsets stay near your mouth, and instrument transmitters suit sources such as guitars. The choice affects more than convenience. Mic distance and position influence how consistent the voice sounds, while visibility, comfort, and handling become practical tradeoffs during a performance.
A handheld system is straightforward for interviews, announcements, and singers who want to control distance from the mic. That control lets a practiced speaker move the mic closer for a quiet phrase or farther away for a loud one, but it requires a free hand and consistent technique. A lavalier works well when a presenter needs both hands for a demonstration or a camera shot should look uncluttered. Its small size is discreet, though clothing rub and a position far from the mouth can make speech less clear. A headset keeps the mic close to the mouth, which can help a fitness instructor remain audible while moving around, at the cost of being more visible and requiring the speaker to wear it.
Consider a cooking class filmed in a busy kitchen. A presenter who turns toward a stove may sound quieter on a lavalier pinned to one side because their mouth moves farther from the capsule. A headset keeps the capsule in a more consistent position, helping level stay steadier as the presenter turns. The tradeoff is visibility and comfort: a headset can be more noticeable, and the speaker must be willing to wear it for the whole class.
For guitars and similar instruments, a bodypack transmitter with the correct instrument input can replace a cable across the stage. This gives the player freedom to move, but adds batteries and a radio link to troubleshoot; a cable is simpler when movement is limited. Before buying, check that the system includes the connector and microphone or instrument input you need. A compatible receiver alone does not guarantee that every brand’s transmitter will pair with it, so verify the exact model compatibility.
Choose Frequencies for Your Country and Your Venue
Choose a wireless microphone frequency band that local rules allow, then check whether that band is clear where you plan to use it. Radio spectrum is shared with services such as television and mobile networks, and legal availability differs by country and can change over time. A system that is legal but crowded may still be unreliable, while a clear frequency outside the permitted band is not a usable solution.
UHF, VHF, and 2.4 GHz systems operate in different parts of the radio spectrum, but the label alone cannot tell you which system will perform best. Each band has different regulatory limits and shares space with different devices; the specific product also shapes range, channel capacity, and resistance to interference. Check current guidance from your country’s regulator before you buy or operate a system. Don’t assume a frequency used on tour in one country is allowed at home, because rules follow the place of use, not the equipment’s origin.
Imagine you are equipping a community hall for a panel discussion. A system that worked in a quiet rehearsal room may encounter broadcast or other wireless traffic during the event. Scan for available frequencies at the venue, and coordinate channels when several microphones will run together. A scan helps identify what is present at that moment; coordination then chooses a set of frequencies that can coexist. Independent channel picks can interfere even if each microphone works fine alone, because transmitters can disrupt one another when their frequencies are poorly spaced.
More channels on a product description do not guarantee that you can run that many systems at a particular location. The usable count depends on equipment, bandwidth, frequency coordination, and local radio conditions. As the number of microphones rises, coordination becomes more important and there may be fewer clean combinations to choose from. If you need several mics, check the manufacturer’s coordination tools and test the full setup together, including any other wireless systems in use at the venue.
Understand Why Range Changes from Room to Room
A wireless microphone’s usable range depends on the radio path, not a single fixed distance printed on the box. Walls, people, transmitter power, antenna placement, and local radio traffic can all affect whether the receiver gets a stable signal. Treat the advertised range as a guide under stated conditions, not a promise for every venue: a clear outdoor test says little about a crowded room with walls and equipment between the mic and receiver.
A receiver tucked behind a metal cabinet may struggle even when the speaker is only a short walk away, because the cabinet can block or weaken the radio path. A crowded room can also change reception as people move between the transmitter and antennas. Think of the signal like a flashlight beam: distance matters, but so do obstacles and where you point it. This is why moving the receiver or antenna a short distance may help more than simply choosing a system advertised with a longer range.
Before a performance, walk the entire route the speaker or performer will use while watching the receiver’s signal indicators and listening for dropouts. Test from the stage, the back of the room, and any aisle where the speaker might stop. If a camera operator will move around, test that path too rather than assuming the stage check covers it. The route test checks the actual operating conditions, so a clean result gives you more useful confidence than a distance estimate.
Place receiver antennas where they have a clear path toward the transmitters, and avoid hiding them inside metal racks or behind dense obstacles. For a larger system, follow the manufacturer’s advice on antenna spacing and distribution. Good placement can improve reliability and reduce weak spots along the route, but it cannot override local interference or make incompatible equipment work together. If reception remains unstable after repositioning, revisit frequency coordination and the room’s radio conditions.
Follow This Sound Check Before the Audience Arrives
- Check the rules and scan the room. Confirm that the operating band is allowed in your location, then scan for clear frequencies at the venue.
- Coordinate every system. When you use several microphones, use the manufacturer’s coordination method and set each system to its assigned frequency.
- Place the receiver and antennas thoughtfully. Keep them out of enclosed metal cabinets and position antennas according to the system’s guidance.
- Set gain and listen. Speak or play at performance volume. Adjust levels so the audio is clear without clipping or sounding weak.
- Walk the real route. Test from the stage, aisles, and other locations where the speaker will move.
- Check batteries and prepare a backup. Confirm battery status, keep spares or charged replacements ready, and place a wired microphone within reach.
This sequence catches the usual surprises before people fill the room. Scanning and coordination address radio problems, while the level check tests the audio path after the receiver. A receiver might show a signal while an overloaded mixer input distorts the voice; a speaker might also sound fine at the lectern and cut out at the far aisle. Check the whole audio path, not just the radio indicator, because each stage can fail in a different way.
For a small church service, you could complete the scan and walk test before the congregation arrives, then keep a wired microphone at the lectern as a quick fallback. That backup may not follow a moving speaker, but it can keep announcements or a service going if a wireless channel fails. Rechargeable transmitters and charging cases can make routine preparation easier and reduce the need for disposable batteries, but they still need a charging plan and a way to replace worn batteries. A short checklist helps another volunteer repeat the setup reliably.
Compare Digital and Analog Features Against Your Actual Needs
Digital and analog systems can both serve a real job; the right choice depends on how you will use the system and which features the specific model provides. Digital products may offer clean sound, encryption, low latency, remote control, or scanning tools, but not every model includes every feature. These benefits can simplify a particular workflow, but they do not guarantee better results if the microphone is poorly placed or the radio link is unreliable. Analog systems remain common and can suit many straightforward uses, sometimes with simpler controls or lower cost.
Start with the microphone and the full signal chain: capsule, transmitter, radio link, receiver, gain settings, and the connection to your mixer or camera. Every stage can affect the final recording, so a premium radio feature cannot fix a poorly placed lavalier, an unsuitable mic capsule, or a clipped mixer input. If you are filming dialogue, a compact camera kit may offer a receiver and transmitter with phone or camera connections; check connector compatibility and recording levels before the shoot. A direct connection can save setup time, but only if the output level and connector suit the device.
Suppose you record short interviews in a quiet office. A compact creator kit may save setup time, while a multi-channel stage system may add controls and capacity you never use. For a touring band, remote monitoring and coordinated channels may be more useful because a larger setup needs more oversight. Compare latency, compatibility, outputs, battery arrangements, durability, warranty, and access to replacement transmitters alongside sound quality. A feature only earns its cost when it solves a real constraint in your workflow.
Also plan for growth. A system that meets today’s needs may be harder to expand if compatible transmitters are unavailable or if its receiver lacks the outputs your future setup needs. That can force a full replacement even when the original system still works. Check manufacturer compatibility information before mixing transmitters and receivers, even within the same brand, and consider whether the likely expansion is worth paying for now.
Keep a Backup Plan for Batteries, Dropouts, and Silent Channels
Reliable wireless use includes a plan for dead batteries, interference, and audio faults. Check battery type and expected runtime for your specific transmitter, confirm battery status before the event, and bring spares or charged replacements. Runtime varies by model and use, so a number from another system may not match yours. Planning a replacement before the event prevents an avoidable battery change from turning into a long interruption.
If a microphone keeps cutting out, first check whether the transmitter is muted, then inspect battery status, antenna placement, and the receiver’s signal. If the receiver shows signal but no sound reaches the mixer, check the receiver output, mixer channel, mute state, and gain. These checks separate a radio problem from a downstream audio problem, which helps you choose the right fix instead of changing frequencies when the audio cable is the issue. A quick swap to a known-good cable or wired microphone can help isolate the fault.
For example, a school’s evening concert might run late after a battery was installed during an afternoon rehearsal. A spare set at the sound desk can solve that problem in seconds, while relying on the original battery’s expected runtime leaves little margin if the event runs long. A wired mic on a stand gives the event another route if the radio link fails, even though it cannot follow a moving performer. The backup is most useful when it is already connected or close enough to set up quickly.
Label transmitters and receivers, note assigned frequencies, and keep compatible replacement parts where staff can find them. That small bit of organization makes a busy handoff less stressful and reduces the risk of returning a transmitter to the wrong channel. In a setup with multiple microphones, write down which mic belongs to which receiver so a quick battery change does not become a channel mix-up.
Frequently Asked Questions
How does a wireless microphone system work?
The microphone captures sound, and a transmitter sends that audio to a receiver over radio waves. The receiver converts it back into audio and sends it to a mixer, camera, or recording device. The receiver still needs a suitable audio connection to that equipment.
How far can a wireless microphone reach?
There is no single dependable distance for every venue. Walls, people, antenna placement, transmitter power, and local radio traffic affect the usable range. Test the full route in the space where you plan to use the mic.
Why does my wireless microphone keep cutting out?
Dropouts can come from interference, blocked or poorly placed antennas, low batteries, or a weak radio path. Check the battery and receiver signal, then move the receiver or antennas according to the manufacturer’s guidance and scan or coordinate frequencies. Walk the speaker’s route while listening.
How many wireless microphones can I use at once?
The number depends on the equipment, bandwidth, frequency coordination, and radio traffic at your location. A product’s advertised channel count does not guarantee the same number will work at every venue. Coordinate all systems together and test them in the room.
Do I need a license to use a wireless microphone?
Licensing and permitted frequency bands depend on your country and the specific frequencies you use. Check your national regulator’s current guidance before buying or operating a system. A band permitted in one country may be restricted or unavailable in another.
Can I connect a wireless microphone to a phone, camera, or computer?
Many systems can connect to these devices, but the output, connector, and any required adapter must match the recording device. Compact creator kits often include phone or camera connections, though features vary by model. Check compatibility and record a short test before filming.
Conclusion
A wireless microphone can make a presentation, performance, or recording feel effortless, but the radio link needs a little care. Choose a mic style that fits the speaker, confirm local frequency rules, scan and coordinate at the venue, and test the full route before the room fills.
Keep charged batteries and a wired backup close enough to grab. When the first speaker steps away from the lectern, you want the audience to hear the story—not the sound of a signal dropping out.