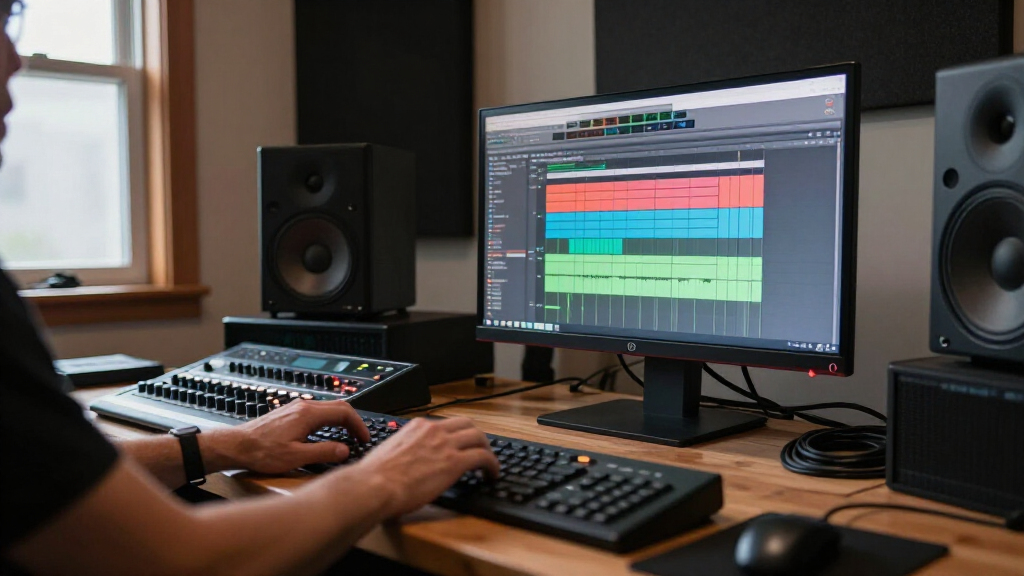

Use this guide to turn a recording into a clean, finished audio file with desktop audio editing software. It is for beginners who can open an app and manage files but have not yet followed an editing workflow. You will import a copy of your recording, remove unwanted sections, balance its volume, listen for problems, and export the result. Allow 30–60 minutes for a short recording; longer or more complex projects take more time.

Get audio and creator gear delivered free with Prime
- Fast, free delivery on millions of items
- Prime Video, Amazon Music and more included
- Member-only deals all year

Adobe Audition Audio Recording, Editing, and Mixing Software, 1-Month Subscription, PC/Mac
- ✔ Subscription term: 1 month with auto-renewal
- ✔ Platforms: PC and Mac
- ✔ Minimum operating systems: Windows 10; Mac OS X

SOUND FORGE Audio Studio 16 Audio Editing Software for Windows 10/11
- ✔ Platform: Windows 10/11
- ✔ Processor: 1.4 GHz; 64-bit
- ✔ Memory: 512 MB RAM

WavePad Audio Editing Software
- ✔ Supported audio formats: WAV, MP3, VOX, GSM, WMA, RealAudio, AU, AIFF, FLAC, OGG, and more
- ✔ Editing functions: Cut, copy, paste, delete, insert, silence, auto-trim
- ✔ Audio effects: Echo, amplification, noise reduction, normalize, equalizer, envelope, reverb, reverse
Difficulty: Beginner | Time: 30–60 minutes
What You’ll Need
Tools & Materials:
- A computer with audio editing software installed
- The audio file you want to edit
- Headphones or speakers
- Free storage space for the project and exported file
Knowledge:
- Basic computer file management
- How to play, pause, and adjust volume on your computer
Keep the original recording unchanged. Create a working copy in a project folder, and check whether the software saves edits in its own project format. For music distribution, broadcast, or client delivery, get the required file format, sample rate, bit depth, and loudness target before editing.
Adobe Audition Audio Recording, Editing, and Mixing Software, 1-Month Subscription, PC/Mac
Adobe Audition takes the top spot for projects where editing is part of a larger mixing or video finishing workflow. Its combination of multitrack, waveform, and spectral displays gives us different ways to inspect and shape audio, and the listing specifically connects it to finishing sound for video. That makes it a more natural choice than SOUND FORGE when a project centers on layered audio or video production; SOUND FORGE instead emphasizes a bundled range that includes mastering and analog-media digitization.Audition also supports PC and Mac, avoiding the Windows restriction that applies to SOUND FORGE. Its main drawback is access: this offer is a one-month subscription with auto-renewal, so buyers should pay attention to the subscription term. Compared with WavePad, Audition’s described workflow tools are more clearly aimed at multitrack production, while WavePad’s listing highlights format breadth and everyday edits. Choose Audition for its stated production workflow, not simply because it carries a broad editing label.
Pros:
- Includes multitrack, waveform, and spectral display tools.
- Covers recording, editing, mixing, and restoration.
- Supports audio finishing for video production workflows.
- Available for both PC and Mac.
Cons:
- The listed one-month subscription auto-renews.
- Existing subscribers must complete their current membership term before linking a new subscription term.
Best for: Editors working on multitrack audio or video projects who need waveform and spectral views on PC or Mac.
Not ideal for: Buyers who want a non-renewing purchase, or who only need straightforward cuts and effects without a multitrack or video workflow.
Bottom line: Choose Audition when multitrack control and video audio finishing matter enough to justify a renewing subscription.
“Choose Audition when multitrack control and video audio finishing matter enough to justify a renewing subscription.”
SOUND FORGE Audio Studio 16 Audio Editing Software for Windows 10/11
SOUND FORGE Audio Studio 16 stands out for combining several stages of audio work in one Windows-focused package: recording, editing, restoration, and mastering. It also names vinyl and cassette digitization, giving it a specific advantage for buyers preserving analog recordings. WavePad offers a wider stated list of supported formats and familiar editing operations, but its description does not call out mastering or analog transfer. Audition, by contrast, is more clearly positioned for multitrack and video work.This breadth makes SOUND FORGE a sensible fit for someone who wants to move from capture through cleanup and finalization without choosing a tool based only on one workflow. The tradeoff is platform flexibility: it supports Windows 10/11 only, whereas Audition also lists Mac support. Registration and some functions also require an internet connection. Its low stated memory and storage requirements may look approachable, but the product information still calls for a compatible internal sound card and does not remove the need to verify a particular computer’s fit.
Pros:
- Combines recording, editing, restoration, and mastering tools.
- Includes vinyl and cassette digitization.
- Supports podcast and video soundtrack production.
- Includes professional effects and CD creation.
Cons:
- Works only on Windows 10/11.
- Internet access is required for registration, validation, and some functions.
Best for: Windows users recording, restoring, or mastering audio, especially those digitizing vinyl or cassette tapes.
Not ideal for: Mac users, buyers who need an explicitly described multitrack or video workflow, or users who cannot rely on internet access for registration and some functions.
Bottom line: Pick SOUND FORGE when a Windows-based toolkit for capture, restoration, mastering, and analog digitization is the priority.
“Pick SOUND FORGE when a Windows-based toolkit for capture, restoration, mastering, and analog digitization is the priority.”
WavePad Audio Editing Software
WavePad is the practical pick when our work involves editing music, voice, or other recordings in a variety of common formats. The listing names WAV, MP3, FLAC, OGG, AIFF, and several more, then pairs that compatibility with cut, copy, paste, silence, auto-trim, and effects such as noise reduction and equalization. That makes its stated strengths easy to match to routine cleanup and file handling. Compared with SOUND FORGE, WavePad’s description is more explicit about supported formats; SOUND FORGE gives more detail about restoration, mastering, and analog digitization.VST plugin support can expand the available tools and effects, which gives WavePad a route beyond its built-in list. However, the product information does not specify system requirements or clarify which features are included in the download version. Buyers should resolve those questions before settling on it. Audition makes more sense when multitrack and video finishing are central, while WavePad is the better fit when the listed format support and common editing actions matter more than a specifically described production workflow.
Pros:
- Supports a broad selection of audio formats.
- Includes common cut, paste, delete, silence, and auto-trim functions.
- Provides effects including noise reduction, equalization, reverb, and normalization.
- VST support can extend the available tools and effects.
Cons:
- The listing does not specify system requirements.
- The listing does not clarify which features are available in the download version.
Best for: People who edit voice or music files in multiple formats and want common trimming, cleanup, effects, and VST support.
Not ideal for: Buyers who need confirmed system requirements, clearly documented download-version features, or a listed multitrack and video workflow.
Bottom line: Choose WavePad for format flexibility and everyday editing, after confirming that the download version and system requirements fit your setup.
“Choose WavePad for format flexibility and everyday editing, after confirming that the download version and system requirements fit your setup.”
As an Amazon Associate we earn from qualifying purchases.
Before You Start
Save your working copy in a folder with a clear name, such as Interview Edit. Use headphones at a comfortable volume. Editing can make audio louder, so lower your listening level if the recording peaks sharply. If the app offers undo history or autosave, learn where those controls are before making changes.
Step-by-Step Instructions
Step 1: Create a project and import the recording
Open the editor and create a new project. Use its import command or drag the working copy into the project. Wait for the waveform to finish loading, then save the project in your editing folder. If the software asks whether to copy or reference the media, choose the option that keeps project media together when you need to move the project to another computer.
Tip:Keep the original file outside the project if you want a separate untouched backup.
Check: The waveform appears on a track, playback works, and the project has a saved name.
Step 2: Set up a clear view of the recording
Zoom in or out until you can see the full recording and its quieter gaps. Play a short section to confirm that the correct file is loaded. If the project has separate tracks, identify what each track contains before editing; mute or solo tracks to check them when useful.
Tip:A waveform shows loud and quiet sections, but it does not tell you whether a sound is useful. Listen before removing anything.
Check: You can locate the beginning and end of the recording and hear the expected content.
Step 3: Remove unwanted sections
Play the recording and mark sections to remove, such as long pauses, false starts, or irrelevant material. Select one section at a time, replay the selection if needed, then use the editor’s delete or cut command. Use undo immediately if the edit removes wanted audio. For speech, leave a small natural pause around words so the result does not sound rushed.
Tip:Make cuts at quiet points when possible. A cut in the middle of a word or sustained musical note can sound abrupt.
Check: The unwanted material is gone, and playback across each edit sounds natural.
Step 4: Reduce distracting background noise
Listen for steady hiss, hum, or room noise. If the software has noise reduction, select a section containing only the unwanted background sound and capture a noise profile as directed by the app. Apply a modest reduction to the recording, then compare it with the original. Undo or reduce the effect if voices or instruments sound watery, metallic, or muffled.
Tip:Noise reduction cannot reliably remove every sound, especially changing noises such as traffic or people talking. A light touch usually preserves the recording better.
Check: Background noise is less distracting, and the wanted sound still feels clear and natural.
Step 5: Balance the recording’s volume
Play the loudest and quietest parts. Use the editor’s normalize, gain, or volume controls to bring the overall level into a usable range without clipping. If the recording varies widely, adjust separate sections or use gentle compression only when you understand the control. Watch the meters during playback and keep peaks below the clipping limit.
Tip:Red clipping indicators or a flat-topped waveform can signal distortion. Lower the gain before adding more processing.
Check: Quiet sections are audible, loud sections remain clear, and the meters do not show clipping.
Step 6: Review the full edit
Listen from beginning to end at a comfortable level. Check the opening, closing, every cut, and any section where you applied an effect. Fix clicks, awkward gaps, or uneven volume. If the beginning or ending contains unnecessary silence, trim it while leaving a brief natural lead-in or tail when the content needs one. Save the project after corrections.
Tip:Take a short break before this review if you have been listening repeatedly; fresh attention makes edit problems easier to hear.
Check: The whole recording plays without missing content, sudden jumps, unwanted noises, or clipping.
Step 7: Export a finished audio file
Choose the export or render command. Select the required file type: WAV is a common choice for an uncompressed master, while MP3 is useful for smaller files and sharing. Set the destination folder and a descriptive filename. Keep the source sample rate and channel layout unless the recipient specifies different settings. Export, then leave the project open until rendering finishes.
Tip:Do not overwrite the source recording. If you need both a master and a sharing copy, export each with a distinct name.
Check: The editor reports a completed export, and the new file appears in the chosen folder.
Step 8: Check the exported file
Open the exported file in a media player or reimport it into the editor. Play the start, middle, and end, and confirm the duration, sound, and channel balance. Check the filename and format against the delivery request. If the file is silent, incomplete, or distorted, return to the project, correct the issue, and export again.
Check: The exported file plays correctly outside the project and matches the intended content.
Common Mistakes to Avoid
- Editing the only copy of the recording. — Make a working copy first and keep the original unchanged.
- Cutting too close to speech or music. — Listen around each edit and preserve a small natural pause or note tail.
- Applying strong noise reduction or compression. — Use modest settings, compare with the original, and undo processing that damages the sound.
- Exporting with the wrong format or destination. — Check the delivery requirements and confirm the filename and folder before rendering.
Troubleshooting
Problem: The imported file has no waveform or will not play.
Solution: Confirm that the file is fully downloaded and supported by the editor. Try importing it through the app’s file menu, or convert a copy to a supported format.
Problem: The edited audio sounds clipped or harsh.
Solution: Lower track gain or clip gain, check for red meter peaks, and export again. If the source itself is distorted, editing cannot fully restore the lost detail.
Problem: Noise reduction makes voices sound unnatural.
Solution: Undo the effect or reduce its strength. Use a shorter noise sample that contains only steady background sound, then compare again.
Problem: The export is silent or too short.
Solution: Check that the correct tracks are unmuted and included in the export range. Export the full project or intended selection, then test the new file in a player.
What Success Looks Like
The project remains saved, the original recording is intact, and the exported file contains the intended audio from beginning to end. Playback has no unwanted cuts, abrupt level jumps, or avoidable clipping. The format, filename, and destination match the task or delivery request.
Next Steps
Keep the project file and exported audio together if you may need to revise the edit. Store a backup of both in a separate location. For another version, duplicate the project or use a new filename before changing settings. If the audio is for a client, platform, or broadcast, compare it with that recipient’s technical specifications before delivery.
Frequently Asked Questions
Which audio format should I export?
Use the format requested by the recipient. WAV is a common uncompressed master format; MP3 is smaller and widely compatible for sharing. Avoid converting repeatedly, since each lossy conversion can reduce quality.
Can I recover audio that was recorded with clipping?
You can lower its playback level, but clipping distortion is often baked into the recording. Some restoration tools may soften it, though they cannot always recreate the missing sound.
Should I normalize or use compression?
Normalization changes the overall level to a chosen peak or loudness. Compression reduces differences between louder and quieter parts. Start with a modest level adjustment; use compression only when the recording still varies too much.
How do I make edits without losing the original?
Keep the original file untouched, edit a separate copy, and save the session as a project. Use a new export filename for each finished version.
Halloween Picks
halloween
As an affiliate, we earn on qualifying purchases.