
TL;DR
Moving your rig into a closet can drastically reduce noise, but ventilation and placement matter more than foam. Proper sealing, strategic treatment, and airflow are key to keeping your system cool and quiet.
Ever wish your noisy AI rig could disappear, hidden away in a closet or cabinet? You’re not alone. Many creators and AI enthusiasts have discovered that moving the machine dramatically cuts noise — but only if you consider placement and ventilation. Foam panels alone won’t cut it. It’s about where you put your treatment, how you block sound leaks, and how you keep your system cool.
This guide walks you through the secrets of acoustic dampening, smart placement, and the tricky art of making a closet work for a high-performance rig. You’ll learn how to make your setup quieter, more efficient, and easier to manage, so your workspace stays peaceful and your hardware stays healthy.
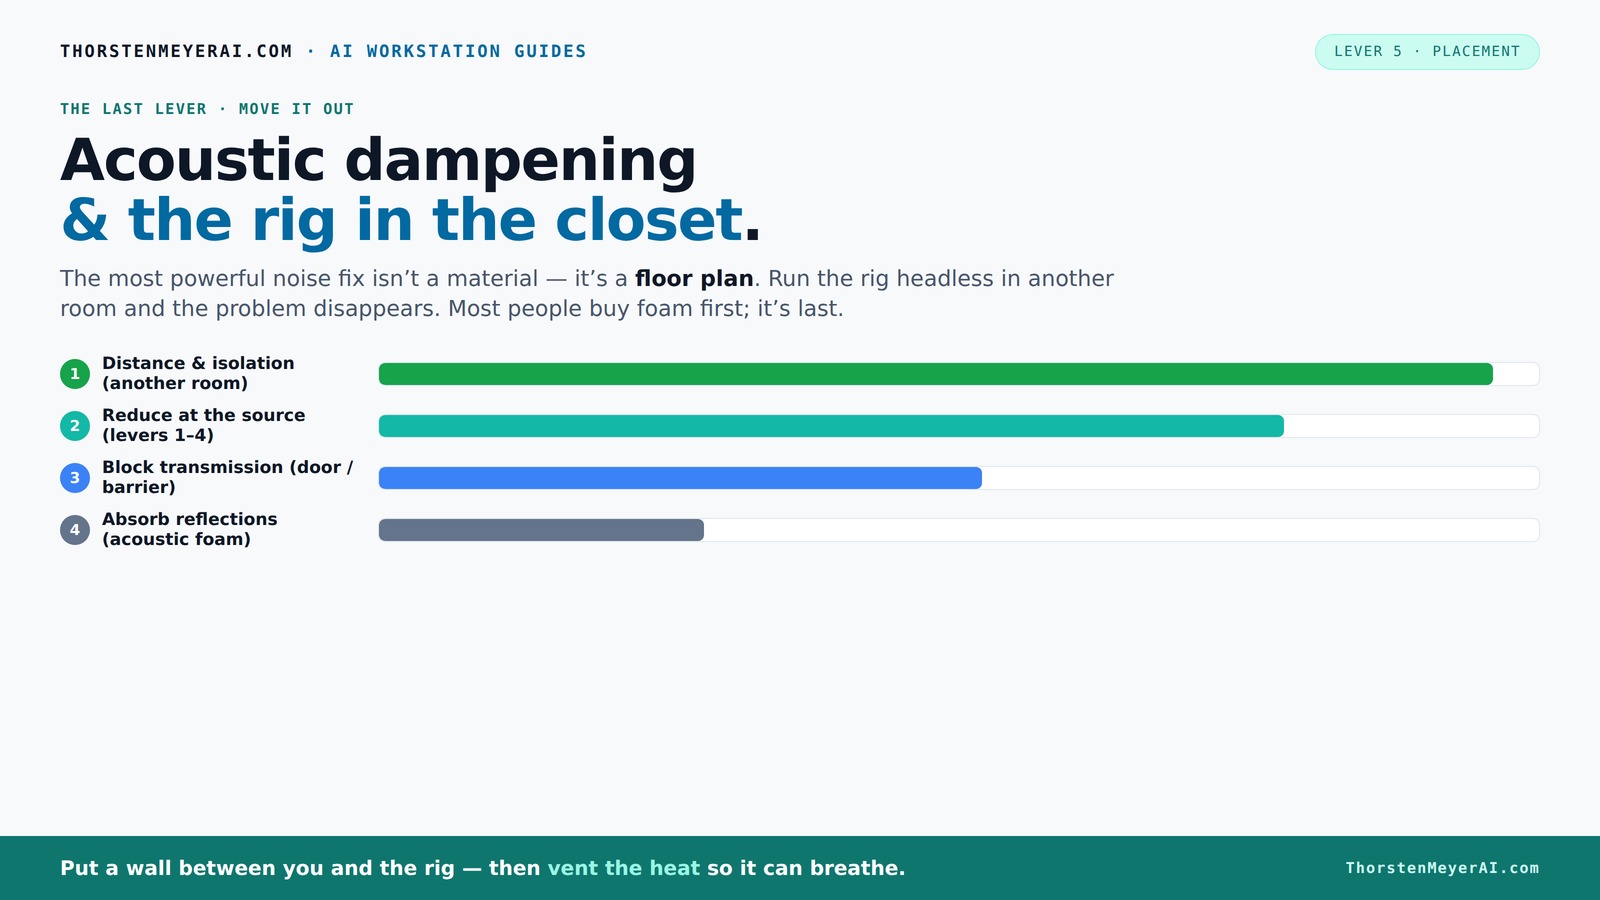
Acoustic dampening
& the rig in the closet.
The most powerful noise fix isn’t a material — it’s a floor plan. A rig you can’t hear because it’s in another room beats any amount of foam. Tap the approaches in Part 1 to see what actually works.
(another room)
(levers 1–4)
(door / barrier)
(acoustic foam)
Contain the noise, not the heat
Key Takeaways
- Moving your rig into a closet or separate room can cut noise more than any foam panel ever could.
- Placement at first-reflection points and near the sound source maximizes acoustic treatment effectiveness.
- Seal gaps around doors and vents to prevent sound leaks, especially in small spaces.
- Proper ventilation is mandatory—use quiet exhaust fans and ducting to keep your system cool.
- A balanced approach of placement, treatment, and sealing delivers the quietest, coolest rig in a small space.

24 Pack Black 12 x 12 x 2 Inches Pyramid Designed Acoustic Foam Panels, Sound Proof Foam Panels for Walls, High Density and Flame-Retardant Acoustic Panels, Sound Panels for Recording and Home Studio
Exceptional Sound Absorption:These pyramid acoustic panels are engineered to effectively absorb sound waves, reducing echo and reverberation. With...
As an affiliate, we earn on qualifying purchases.
As an affiliate, we earn on qualifying purchases.
Why Placement and Material Matter Equally for Quiet and Cool
You might think slapping foam panels on the walls will instantly quiet your system. Not quite. Acoustic treatment absorbs echoes and reduces reflections inside a space, but it doesn’t block sound transmission. Placement is everything. The most effective approach involves both smart positioning of panels and strategic location of your rig.
Imagine a loud GPU sitting in a corner, blasting noise into your room. Moving it into a closet or another room makes a bigger difference than any foam. Then, adding treatment at the right spots—like first-reflection points—further cuts down echo and reverberation, making your space sound better and feel quieter.
It's important to understand that the effectiveness of soundproofing depends heavily on both the materials used and their placement. Foam panels and bass traps shape the internal acoustics, but if sound leaks through gaps or is transmitted directly from the source, these treatments won’t fully solve the problem. Proper placement ensures that sound waves are absorbed or deflected before they reach sensitive areas or escape the enclosure, which means fewer disturbances and less noise pollution.
However, there's a tradeoff: overly sealing or isolating your setup can restrict airflow, leading to overheating. Balancing soundproofing with ventilation is crucial. Good placement minimizes the need for excessive treatment and allows your hardware to operate safely without sacrificing acoustics.

AC Infinity AIRPLATE S1, Quiet Cooling Fan System 4" with Speed Control, for Home Theater AV Cabinets
An ultra quiet fan system designed for cooling cabinets that requires minimal noise.
As an affiliate, we earn on qualifying purchases.
As an affiliate, we earn on qualifying purchases.
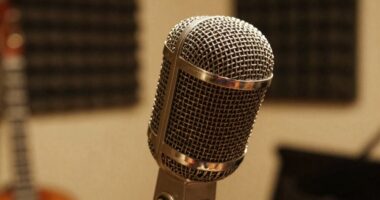
Find the First-Reflection Points — The Key to Smarter Sound Treatment
First-reflection points are where sound from your speakers or your rig first bounces off walls and ceilings before reaching your ears. Addressing these spots can drastically improve your room’s clarity and reduce echo. The easiest method? The mirror trick. Sit in your usual listening position and have a friend move a mirror along the walls. Wherever you see a speaker in the mirror, that’s a reflection point.
Place acoustic panels or foam at these spots. For a closet setup, focus on walls facing your microphone and the side walls closest to the rig. This targeted placement prevents sound reflections from bouncing around, making your recordings cleaner and your space quieter.
Understanding why these points matter is key: reflections at these spots cause comb-filtering and echo, which muddle sound quality and can make your system seem louder than it actually is. By treating these reflection points, you effectively break the feedback loop of sound bouncing around, which improves clarity and reduces perceived noise. This targeted approach is more efficient than covering every wall, saving space and resources while delivering a noticeable difference in sound quality.
Keep in mind: neglecting these reflection points means residual echoes that can make your space sound cluttered and increase the volume perception, defeating the purpose of your quiet setup. Proper identification and treatment of these points lead to a more controlled acoustic environment, which is especially valuable in small, enclosed spaces like closets.

Focusound 52 Pack Acoustic Foam Panels 1" x 12" x 12" Sound Proof Foam Panles Soundproofing Noise Cancelling Wedge Panels for Home Office Recoding Studio with 300PCS Double-Side Adhesive
Soundproofing - Acoustic foam panels triangular grooves structure for better noise absorption, helps to reduce and absorb unwanted...
As an affiliate, we earn on qualifying purchases.
As an affiliate, we earn on qualifying purchases.
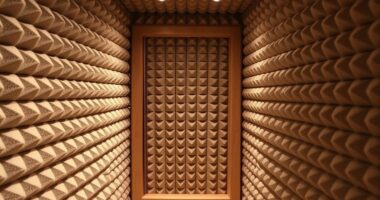
How to Position Acoustic Panels for a Closet Studio
Placement is everything. For small closets, 2-inch thick panels are usually enough. Mount them at ear level or within the main sound field. Focus on walls directly facing your rig, the ceiling, and the walls behind your microphone. You can learn more about acoustic panel placement for small spaces.
Don’t forget the door. Seal gaps with weatherstripping or acoustic sealant to prevent sound leaks. Use rugs or heavy fabric on the floor to absorb low frequencies and reduce flutter echo. For best results, distribute panels across multiple surfaces, not just in one corner. About 20-30% wall coverage can make a noticeable difference.
Adding bass traps at the corners can help manage low-frequency buildup, which is common in small, enclosed spaces. Proper placement of bass traps—ideally in the corners—allows them to absorb standing waves and reduce boominess. Consider the tradeoff: more panels improve sound quality but can clutter your space; prioritize reflective surfaces and problem areas to maximize efficiency without overcrowding.
Remember, the goal is to reduce echo and control resonance without creating a space that feels overly sealed or dead. Strategic placement of panels, bass traps, and diffusers creates a balanced environment that’s both quiet and lively enough for accurate monitoring.
Ultimately, the right positioning depends on your specific space. Experiment with different placements and listen carefully to how sound changes. Small adjustments can make a big difference in achieving a professional-quality sound environment in a limited area.

NZXT H5 Flow 2024 - Compact ATX Mid-Tower PC Gaming Case - High Airflow - 2 x 120mm Fans Included - 360mm Front & 240mm Top Radiator Support - Cable Management System - Tempered Glass - Black
EXCEPTIONAL GPU COOLING-The PSU shroud is perforated on the side and bottom, enabling optimal air intake from two...
As an affiliate, we earn on qualifying purchases.
As an affiliate, we earn on qualifying purchases.
Mastering Soundproofing vs. Acoustic Treatment
Soundproofing and acoustic treatment are often lumped together but serve different purposes. Soundproofing blocks sound from leaving or entering a space—think sealing gaps, adding mass, and using heavy doors. Acoustic treatment, on the other hand, improves sound quality inside the room, reducing echo and refining clarity.
In a closet setup, sealing gaps with acoustic sealant and adding mass (like extra drywall or a thick door) help keep noise in or out. Meanwhile, foam panels and bass traps shape how sound behaves inside, making recordings clearer and reducing room reflections.
Understanding the distinction is crucial because relying solely on foam panels for soundproofing is a common misconception. While they help control internal reflections, they do little to prevent sound from escaping through gaps or structural leaks. You can find helpful tips on soundproofing techniques for small spaces to improve your setup. setup is both quiet and acoustically optimized.
Remember: the tradeoff is often between effectiveness and practicality. Complete soundproofing can be complex and costly, so prioritize sealing leaks and adding mass where it counts most, while using treatment to improve internal acoustics.
Ultimately, a combination of good sealing, strategic placement of treatments, and thoughtful structural modifications yields the best results for a quiet, high-quality recording environment.
Ventilation Tricks for a Closet Rig — Keep It Cool Without Noise
Moving a hot, powerful rig into a closet means you need good airflow. If you don’t, heat builds up quickly, causing the system to throttle and fans to roar. The trick? Active ventilation that moves air in and out without creating noise.
Use quiet exhaust fans, ducted vents, or even small inline fans with sound-dampening ducts. A sealed closet without airflow turns into a heat trap, defeating the purpose of a quiet setup. For example, a simple passive vent can be coupled with a low-speed, noise-absorbing fan. This setup keeps the temperature down and noise levels manageable.
Understanding the implications of ventilation choices is key: inadequate airflow leads to overheating, which can cause your system to reduce performance or damage components over time. Conversely, poorly designed ventilation can introduce noise that negates your soundproofing efforts. The goal is to find a balance—using quiet fans and ducting to ensure airflow while minimizing sound transfer. In some cases, custom-built soundproof cabinets with integrated cooling systems are worth considering, especially for high-performance setups. These units often feature variable-speed fans and sound-absorbing materials to keep your hardware cool and your noise levels low. For more detailed guidance, check out this comprehensive cooling guide.
Tradeoffs include potential space constraints and increased complexity, but the payoff is reliable cooling and minimal noise. Proper ventilation is not just a luxury but a necessity for a long-term, stable, and quiet setup.
Sealing Gaps and Adding Mass — Making Your Closet Truly Quiet
Gaps around doors, vents, or electrical outlets are sneaky sound leaks. Sealing gaps with weatherstripping, acoustic sealant, or draft stoppers makes a big difference. Add mass—like an extra layer of drywall or heavy blankets—to walls and doors for extra soundproofing.
Sealing these leaks prevents sound from escaping, which is especially important in small spaces where even tiny gaps can significantly increase noise levels. For example, a door sweep combined with sealing cracks around the door frame can cut noise leakage by over 50%. Adding mass by attaching additional drywall or using mass-loaded vinyl creates a barrier that resists sound transmission. These methods are effective because they increase the density and damping of surfaces, making it harder for sound waves to pass through.
However, remember that sealing gaps and adding mass can also restrict airflow if not done carefully. It's a balancing act: you want to contain sound but also allow adequate ventilation to prevent overheating. Using soundproof doors or venting solutions with sound-dampening features can help maintain this balance.
Consult detailed guides like this resource for step-by-step instructions to optimize your closet’s soundproofing without sacrificing necessary ventilation.
The Secret Sauce: Combining Placement, Treatment, and Ventilation
The most effective quieting strategy blends smart placement, targeted acoustic treatment, and proper ventilation. By putting your rig in a closet or another room, you cut noise at the source. Treat first-reflection points to tame echoes. Seal gaps and add mass to block leaks. And ensure good airflow to keep your hardware cool.
For example, a user might move their GPU into a closet, seal the door, add foam panels at reflection points, and install a quiet exhaust fan. This combo reduces noise by 70%, keeps the rig cool, and frees up their main workspace. It’s all about balancing sound control with heat management.
Understanding that these strategies are interconnected is key: neglecting one can undermine the others. For instance, good placement and treatment won’t be effective if heat buildup causes fans to become noisy or if leaks allow sound to escape. Conversely, excellent sealing and ventilation won’t help if the sound source isn’t properly isolated or treated. The true secret is an integrated approach—each element reinforcing the others for optimal results.
When combined thoughtfully, these strategies turn a small, noisy space into a quiet, efficient work environment. The goal is to minimize noise, prevent overheating, and maintain easy access for maintenance and adjustments.
Frequently Asked Questions
Where should I place acoustic panels in a closet?
Focus on first-reflection points—walls facing your microphone, ceiling, and side walls near your sound source. Use a mirror test to identify these spots and aim for about 20-30% wall coverage for noticeable improvements.Do I need bass traps in a small closet booth?
Yes, especially if you notice low-end buildup or standing waves. In tight spaces, bass traps in corners help tame these low frequencies and improve overall sound clarity.How thick should the panels be for vocal recording?
For small spaces, 2-inch thick panels work well. Larger rooms or those needing low-frequency control benefit from 4-inch panels or bass traps.What is the difference between soundproofing and acoustic treatment?
Soundproofing blocks sound from entering or leaving a space—think sealing cracks and adding mass—while acoustic treatment shapes how sound behaves inside, reducing echo and improving clarity.Can I make a closet booth usable without major construction?
Absolutely. Seal gaps, add soft materials like blankets or rugs, and use portable acoustic panels. Ventilation can be achieved with quiet fans or passive vents to keep your system cool without extensive remodeling.Conclusion
The secret to a quiet, efficient 'rig in the closet' isn’t just about stuffing foam everywhere. It’s about smart placement, sealing gaps, and managing airflow. When you treat the sound at its source and keep your hardware cool, noise becomes a minor issue—if it’s an issue at all.
Think of your closet as a high-tech sanctuary: quiet, cool, and out of sight. With a little planning, your noisy machine transforms into a silent partner in your workflow. So next time you’re tempted to just buy foam, remember: placement and ventilation are your true allies.