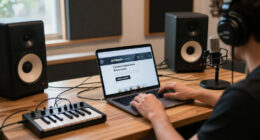
Set up a wireless microphone to capture clear speech on a phone or camera for videos, livestreams, or creator interviews. This beginner guide covers choosing the right connection, pairing the transmitter and receiver, positioning the mic, and checking the recording before you start. Allow about 15-30 minutes for setup and a sound test.

Get audio and creator gear delivered free with Prime
- Fast, free delivery on millions of items
- Prime Video, Amazon Music and more included
- Member-only deals all year

DJI Mic Mini Wireless Microphone Kit (2 Transmitters, 1 Receiver, Charging Case)
- ✔ Kit contents: 2 transmitters, 1 receiver, charging case, accessories
- ✔ Transmitter weight: 10 g
- ✔ Maximum transmission range: Up to 400 m

Mini Mic Pro Wireless Lavalier Microphone for iPhone and Android
- ✔ Microphone type: Mini lavalier, omnidirectional
- ✔ Connectors: Lightning, USB Type-C
- ✔ Compatible devices: Android, iPhone, iPad, smartphones, tablets, laptops

DJI Mic Mini Wireless Microphone Kit (2 Transmitters + Mobile Receiver)
- ✔ Kit contents: 2 transmitters, 1 mobile receiver, accessories
- ✔ Transmitter weight: 10 g
- ✔ Maximum transmission range: Up to 300 m
Difficulty: Beginner | Time: 15-30 minutes
What You’ll Need
Tools & Materials:
- Wireless microphone kit with transmitter and receiver
- Phone or camera with a compatible audio input
- Correct adapter or cable for the recording device, if needed
- Headphones for monitoring audio
- Fully charged microphone batteries or charging case
Knowledge:
- Basic ability to connect accessories to a phone or camera
- Basic ability to record a short video or audio test
Check the microphone kit’s compatibility list before setup. Phones may need a USB-C, Lightning, or headphone-jack connection; cameras commonly use a 3.5 mm microphone input. A USB-C plug does not always mean a device supports USB audio. Charge the kit and update its firmware only if the manufacturer recommends it.
DJI Mic Mini Wireless Microphone Kit (2 Transmitters, 1 Receiver, Charging Case)
When a creator needs to record two voices or keep a kit ready across a full production day, this DJI bundle is the most complete choice here. Its two 10 g transmitters let two people mic up without adding a second wireless system, and the charging case supports up to 48 hours of battery life. That combination gives it a practical edge over the Mini Mic Pro, which is a simpler solo lavalier and runs up to six hours per charge.The kit also adds two noise-cancellation levels and automatic audio limiting. Those controls can help creators adapt to changing surroundings and reduce clipping risk, although they do not replace careful mic placement or listening during a recording. A stated range of up to 400 m is the longest in this lineup, making it the strongest fit for creators who need more room between camera and subject. Compared with the mobile-receiver DJI kit, it includes a charging case and lists a longer maximum range.There are meaningful limits. The system is not waterproof, and its broad device story still depends on compatible connections and equipment. Use with Osmo Mobile series products requires a first-generation DJI OM Multifunctional Module. The transmitter magnets may also interfere with magnetic cards or certain medical or electronic devices, so this kit is not a universal fit. We would choose it for interviews, livestreams, and repeat shoots where two transmitters and charging between takes matter more than the simplest phone-only setup.
Pros:
- Two ultralight 10 g transmitters suit interviews and two-person videos.
- Charging case supports up to 48 hours of battery life.
- Two noise-cancellation levels offer a choice for different surroundings.
- Automatic audio limiting helps reduce clipping risk.
Cons:
- Not waterproof, which limits use in wet conditions.
- Osmo Mobile series connection requires a first-generation DJI OM Multifunctional Module.
- Magnets may interfere with magnetic cards and certain medical or electronic devices.
Best for: Creators recording interviews, two-person videos, or livestreams who want two transmitters and a charging case for longer production days.
Not ideal for: Solo phone creators who want the simplest adapter-based connection, or anyone who needs a waterproof microphone system.
Bottom line: For creators who record two people or need long-running sessions, this is the most capable and adaptable kit in the comparison.
“For creators who record two people or need long-running sessions, this is the most capable and adaptable kit in the comparison.”
Mini Mic Pro Wireless Lavalier Microphone for iPhone and Android
Mini Mic Pro makes the strongest case for creators who want to clip on a mic and start recording from a phone. Its receiver comes with Lightning and USB-C adapters, and the connection does not require app installation or Bluetooth setup. That direct approach is simpler than the DJI kits’ broader connection ecosystems and helps creators move quickly between compatible iPhones, Android phones, tablets, or laptops.This is a single-mic setup, so it suits solo explainers, short social videos, and voice-led clips better than interviews. The DJI kits include two transmitters, giving them a clear advantage when two people need separate microphones. Mini Mic Pro counters with included foam and dead cat wind protection, useful for creators recording indoors and outdoors without sourcing those accessories separately. It also allows a connected device to charge while recording, a helpful detail for phone-based shoots that run longer than expected.Its main constraint is endurance: the microphone records for up to six hours per charge, far below the DJI charging-case kit’s stated battery support. The product description also limits wireless connection to compatible USB-C or Lightning adapters, so it is not a universal receiver for every camera or device. We would pick it when easy phone setup and wind accessories matter more than recording two people, extended sessions, or a long stated transmission range.
Pros:
- Includes both USB-C and Lightning adapters for compatible devices.
- Requires no app or Bluetooth setup.
- Foam and dead cat tips provide indoor and outdoor wind protection.
- Can charge a connected device during recording.
Cons:
- Up to six hours per charge is shorter than the DJI kit’s case-supported battery life.
- Single-mic design is less suited to recording two people than either DJI kit.
- Wireless connection depends on a compatible USB-C or Lightning adapter.
Best for: Solo creators who record on compatible iPhone or Android devices and want an uncomplicated lavalier with wind protection included.
Not ideal for: Interviewers, creators needing all-day recording support, or users whose gear lacks compatible Lightning or USB-C connections.
Bottom line: For quick solo phone videos, Mini Mic Pro keeps setup simple and includes useful wind protection, with shorter endurance and less interview flexibility.
“For quick solo phone videos, Mini Mic Pro keeps setup simple and includes useful wind protection, with shorter endurance and less interview flexibility.”
DJI Mic Mini Wireless Microphone Kit (2 Transmitters + Mobile Receiver)
This version keeps the useful two-person format of the other DJI kit but pairs it with a mobile receiver and accessories rather than a charging case. Two 10 g transmitters make it suitable for interviews and conversations on the move, while USB-C support covers compatible phones, computers, and tablets. For creators already using supported DJI OsmoAudio devices, it also offers a path into that ecosystem.Like the charging-case version, it includes two noise-cancellation levels and automatic limiting to help manage background sound and sudden peaks. Those shared tools make it more flexible than the Mini Mic Pro when recording in changing environments or capturing two people. But its listed transmission range is up to 300 m, compared with 400 m for the charging-case kit, and its transmitters run for up to 11.5 hours. That may cover many mobile shoots, yet it does not offer the same case-supported endurance as the first-ranked DJI bundle.The mobile receiver makes this a focused option for creators who primarily record with compatible mobile devices and want to carry two transmitters. Its tradeoffs are straightforward: it is not waterproof, and Osmo Mobile series connection requires the first-generation DJI OM Multifunctional Module. The description does not specify a charging case, so creators who prioritize recharging between sessions should compare it carefully with the first-ranked kit. Choose this version when the mobile receiver suits your workflow and the shorter range and operating time fit the way you shoot.
Pros:
- Two 10 g transmitters support interviews and two-person content.
- Two noise-cancellation levels adapt to different recording environments.
- Automatic limiting helps prevent audio clipping.
- Works with compatible USB-C phones, PCs, tablets, and supported DJI OsmoAudio devices.
Cons:
- Up to 300 m stated range is shorter than the charging-case DJI kit’s 400 m.
- Transmitters run for up to 11.5 hours; the description does not list a charging case.
- Not waterproof.
- Osmo Mobile series connection requires a first-generation DJI OM Multifunctional Module.
Best for: Mobile creators who record two-person content on compatible USB-C phones, computers, or tablets and want a compact DJI setup.
Not ideal for: Creators who need the longest stated range, case-supported battery life, or a waterproof system.
Bottom line: This is a compact two-transmitter choice for mobile workflows, provided its stated range and operating time meet your shoot’s needs.
“This is a compact two-transmitter choice for mobile workflows, provided its stated range and operating time meet your shoot’s needs.”
As an Amazon Associate we earn from qualifying purchases.
Before You Start
Choose a quiet place for your first test. Keep the transmitter and receiver within the range stated in the manual, with a clear line of sight where possible. Wireless microphones use different connectors and settings, so follow the instructions for your specific kit. If recording an interview, tell the other person where you plan to clip the microphone and ask before attaching it to clothing.
Step-by-Step Instructions
Step 1: Check compatibility and charge the kit
Read the microphone and device manuals to confirm the receiver can connect to your phone or camera. Match the connector and cable to the device’s audio input. Charge the transmitter and receiver, or place them in the charging case as directed, before recording.
Tip: A phone case can block a connector from seating fully. Remove it if the receiver or adapter does not fit securely.
Check: The kit powers on, and you have the correct connection cable or adapter for the recording device.
Step 2: Connect the receiver to your device
Turn off or pause recording, then plug the receiver into the device’s microphone input or compatible digital port. Use the supplied cable when the receiver has a 3.5 mm output. For a camera, connect to the microphone input, not the headphone output. Secure loose cables so they cannot pull the connector during recording.
Tip: Some cameras have a combined input or require a particular cable type. Check the camera manual if the port label or cable is unclear.
Check: The receiver sits firmly in the port, and the device recognizes an external audio source if it displays that status.
Step 3: Power on and pair the microphone
Turn on the receiver and transmitter. Wait for the pairing indicator or screen to show that they are connected. If they do not pair automatically, use the pairing button or menu sequence in the kit’s manual. For kits with multiple transmitters, pair each one separately as instructed.
Tip: Keep the transmitter close to the receiver while pairing. Move other wireless gear away if the connection keeps dropping.
Check: The receiver shows a stable connection for the active transmitter, usually through a solid light, icon, or channel display.
Step 4: Attach the transmitter and position the microphone
Clip the transmitter or attached microphone near the speaker’s upper chest, roughly 15-20 cm below the mouth. Point the microphone toward the speaker as its manual recommends. Keep it clear of necklaces, hair, jacket edges, and fabric that may rub against it. If using a separate lavalier mic, connect it to the transmitter and secure the cable with a little slack.
Tip: For a windy outdoor recording, fit the supplied windscreen. Avoid covering the microphone opening with clothing.
Check: The mic stays in place when the speaker turns their head and moves naturally, without scraping against fabric.
Step 5: Set recording levels and audio options
Open the camera, recorder, or livestream app and select the external microphone if the app offers an audio-input menu. Set the transmitter and receiver gain according to the kit instructions. Speak at the volume you will use during recording and adjust the input so the meter responds without reaching its maximum or clipping.
Tip: Automatic gain control, noise reduction, and safety-track settings vary by kit and app. Start with the manufacturer’s suggested settings, then listen to a test before changing them.
Check: The audio meter moves with speech and stays out of the red or clipping range during your loudest normal words.
Step 6: Record and listen to a test
Record 20-30 seconds while speaking at your normal pace and volume. Include a quiet sentence, a louder sentence, and the movements you expect during the shoot. Play the clip through headphones. Listen for clear speech, steady volume, fabric noise, hiss, distortion, and dropouts.
Tip: Do not judge audio from a phone speaker alone; headphones make low-level noise and brief dropouts easier to hear.
Check: You can hear every word clearly, the loud parts are not distorted, and the recording contains no unwanted rubbing or connection gaps.
Step 7: Secure the setup and monitor during recording
Confirm the receiver and transmitter still show a connection, then check remaining battery and storage. Keep the receiver within the kit’s stated range and avoid placing your body or a metal object between it and the transmitter. Start the recording and watch the audio meter or receiver display when possible.
Tip: For a long session, make a short check recording after any location change, clothing change, or battery swap.
Check: The recording begins, the connection indicator stays stable, and the audio meter continues to respond while the speaker talks.
Common Mistakes to Avoid
- Using a receiver or adapter that does not match the phone or camera input. — Check the device’s supported audio connection and the microphone kit’s compatibility information before recording.
- Clipping the mic where clothing or hair rubs against it. — Position it near the upper chest, keep the opening uncovered, and test normal movement before filming.
- Setting gain too high and recording distorted speech. — Speak at normal and loud volumes during a test, then lower the input until peaks stay clear of clipping.
- Starting a long take without checking pairing or battery. — Confirm the connection and charge level before each session, especially after moving between locations.
Troubleshooting
Problem: The recording uses the phone or camera’s built-in microphone.
Solution: Stop recording, reseat the receiver and adapter, and check whether the app has an input-selection setting. Confirm the device supports audio through that port and try a short test in another recording app.
Problem: The receiver and transmitter will not pair or the signal drops.
Solution: Bring them close together, charge both units, and repeat the pairing steps from the manual. Move away from crowded wireless equipment and keep a clear path between the units.
Problem: Speech sounds distorted, thin, or too quiet.
Solution: Check that the transmitter is close to the speaker and the microphone opening is uncovered. Reduce gain if loud words distort; raise it gradually if speech is quiet, then record and replay another test.
Problem: The audio contains rustling, wind, or intermittent noise.
Solution: Reposition the mic away from fabric edges and jewelry, fit the windscreen outdoors, and check the cable and connectors. Record another sample while repeating the same movements.
What Success Looks Like
Your setup is ready when the device records from the wireless microphone, speech is clear at normal and loud volumes, the audio meter does not clip, and the test contains no rubbing sounds or signal dropouts. The receiver should show a stable connection and enough battery for the planned session.
Next Steps
Save or review the test clip before filming the full session. Keep the microphone kit charged and store its cables, windscreens, and adapters together. After recording, disconnect the receiver carefully, turn off both units, and recharge them. If you change devices, apps, or locations, make another short test before the next recording.
Frequently Asked Questions
Can I use a wireless microphone with any phone?
No. The phone must support audio input through the receiver’s connection, and the plug or adapter must match. Check the phone and microphone compatibility details, then test the actual app you plan to use.
Where should I clip a wireless microphone?
Clip it near the upper chest, about 15-20 cm below the mouth, with the microphone opening facing as directed by its maker. Keep it clear of fabric, hair, and jewelry that can rub or block it.
Do I need headphones while recording?
Headphones help you catch noise and dropouts during a test. Some phones and cameras let you monitor live audio; others do not. At minimum, record a short clip and listen before starting the full take.
How far can I move from the receiver?
Use the range listed for your microphone kit. Walls, bodies, and wireless interference can reduce the usable distance, so test from the farthest position you expect to use and keep the receiver in a clear location.