To build a DIY vocal booth under $150, start by choosing a small space or repurposing a closet for sound isolation. Use affordable materials like foam panels from discount stores or DIY options such as blankets and moving pads for acoustic treatment. Build a simple frame from lightweight lumber or PVC pipes to hold your soundproofing materials. Focus on proper placement of foam panels and bass traps, and consider sealing gaps for better soundproofing. Continue exploring for expert tips to make your space sound professional.
Key Takeaways
- Select a small, quiet space and incorporate soundproofing materials like foam panels or blankets to reduce noise.
- Build a simple frame using inexpensive materials such as PVC pipes or 2×4 lumber for stability.
- Arrange foam panels and bass traps at ear level and in corners to improve acoustics and reduce echoes.
- Use affordable, repurposed items like moving pads or blankets for additional sound absorption.
- Seal gaps and doors with foam tape or weatherstripping to enhance soundproofing within your budget.

TroyStudio Portable Vocal Booth, Large Foldable Microphone Isolation Shield, Music Recording Studio Sound Echo Absorbing Box, Desk & Stand Use Reflection Filter with Thickened Dense Acoustic Foam
【BASIC INFO】: Inside size after setup: 8'' (L) X 10'' (W) X 12'' (H), large space for various…
As an affiliate, we earn on qualifying purchases.
As an affiliate, we earn on qualifying purchases.
Planning and Designing Your Vocal Booth

Before building your vocal booth, it’s essential to carefully plan and design the space to meet your recording needs. Start by determining the size of your booth based on your available space and the equipment you’ll use. Consider how much room you need for comfort and movement, and decide on a shape that minimizes sound reflections and echoes. Think about ventilation—will you need airflow without compromising soundproofing? Sketch a layout that includes space for your microphone, headphones, and other gear. Keep noise sources outside the booth and plan for soundproofing materials. Remember, thorough planning guarantees your booth is functional, comfortable, and effective at capturing high-quality recordings. Taking the time upfront saves frustration and money down the line. Additionally, paying attention to soundproofing techniques can significantly improve your booth’s acoustic isolation. Exploring different acoustic treatment options can further enhance sound quality and reduce unwanted noise.
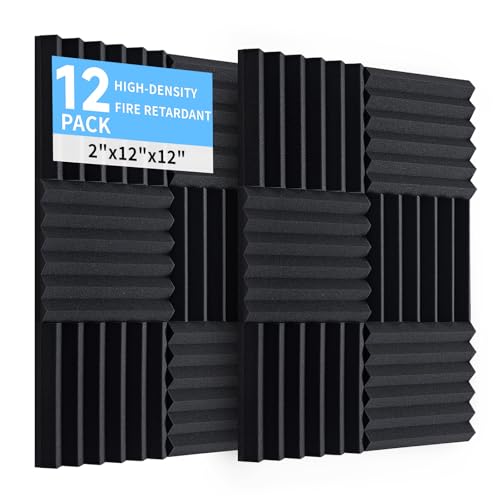
Evovoce 12 Pack Acoustic Panels, 12"x12"x2" High Density Sound Absorbing Wedgefoam soundproofing, Fire Resistant Soundproofing Panels for Home Studio, Office, Recording Room Walls
Professional Noise Reduction Technology:Crafted from high-density polyurethane foam, Evovoce acoustic panels are engineered as premium noise cancelling foam….
As an affiliate, we earn on qualifying purchases.
As an affiliate, we earn on qualifying purchases.
Gathering Affordable Materials and Tools
Once you’ve planned your vocal booth’s design, gathering the right materials and tools becomes the next step. To keep costs low, look for affordable options like foam panels from online retailers or discount stores. Repurposed items, such as thick blankets or moving pads, can also work as sound absorbers. For framing, inexpensive lumber or PVC pipes are budget-friendly choices. You’ll need basic tools like a saw, screwdriver, and measuring tape—many of which you might already have at home. Consider buying in bulk or during sales to save money. Don’t forget adhesive, double-sided tape, or hooks for assembly. Focus on materials that are lightweight yet effective at absorbing sound, ensuring your booth is both affordable and functional. Additionally, selecting soundproofing materials that are both budget-friendly and effective can significantly enhance your booth’s acoustic performance without exceeding your $150 budget. To maximize sound absorption, adding sound absorption panels can help improve the overall quality of your vocal booth. Remember to choose materials with good sound absorption properties to get the best results within your budget.

Portable Recording Booth for Home Studio, Foldable Sound Isolation Vocal Shield with Floor Stand, High-Density Acoustic Blanket Enclosure for Singing, Voiceover & Podcast, Includes Phone Holder
INSTANT STUDIO-QUALITY "DRY" SOUND: Transform any noisy room into a professional vocal booth instantly. Engineered with high-density acoustic…
As an affiliate, we earn on qualifying purchases.
As an affiliate, we earn on qualifying purchases.
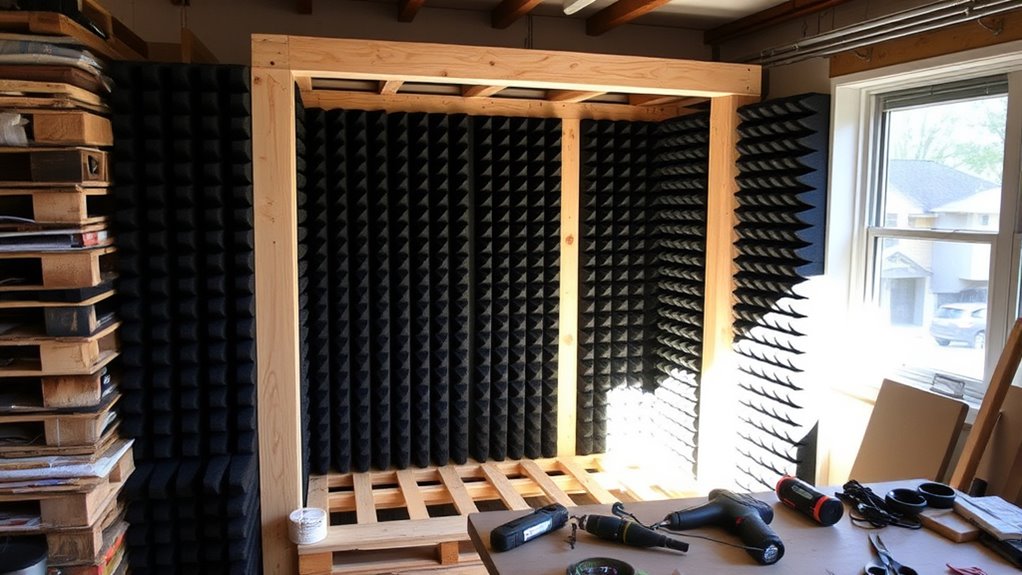
Building the Frame and Structure
To build a sturdy vocal booth, start by choosing the right frame materials that are lightweight yet strong. Assemble the frame carefully, ensuring all pieces fit securely together. Don’t forget to reinforce the structure to keep it stable and safe during use. Incorporating automation technologies into your setup can help in creating a more efficient and effective recording environment. Additionally, ensuring proper soundproofing can significantly enhance audio quality by reducing external noise interference. Exploring innovative solutions such as remote hackathons can also inspire creative ideas for your DIY project, fostering collaboration and problem-solving.
Selecting Frame Materials
Choosing the right materials for your vocal booth frame is essential for creating a sturdy and effective sound enclosure. You want materials that are affordable, lightweight, and easy to assemble. Common options include 2×4 lumber, which offers strength and affordability, or PVC pipes for a lightweight, portable frame. Metal pipes or conduit can also work if you prefer a more durable structure. Avoid heavy or costly materials that could make your booth difficult to move or build on a budget. Consider how much space you need and whether you want the frame to be permanent or temporary. Whichever you choose, ensure the materials can support your soundproofing panels and withstand regular use without warping or breaking.
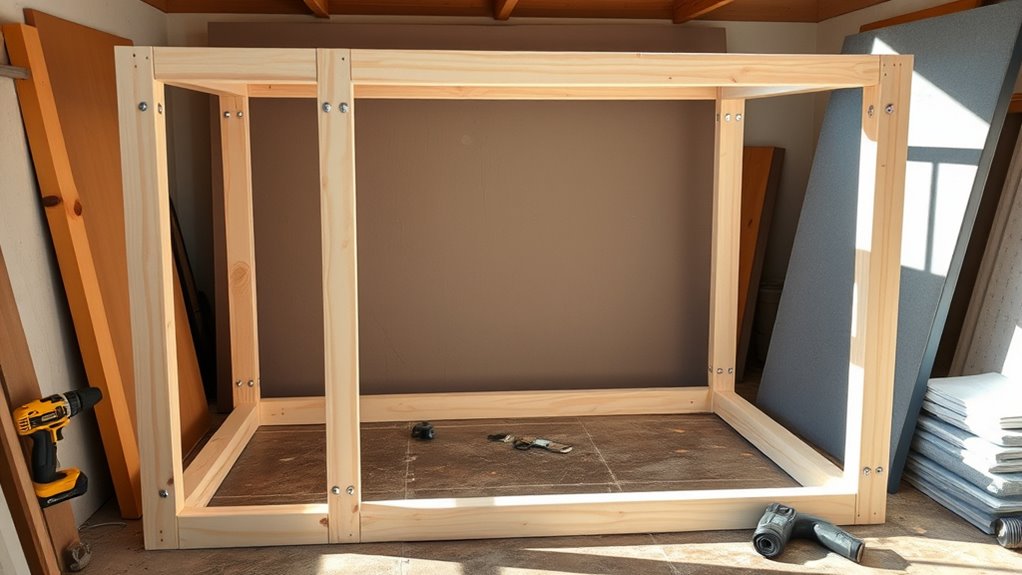
Assembling the Frame
With your frame materials selected, it’s time to start assembling the structure. Begin by cutting your PVC pipes or wooden dowels to the required lengths based on your design. Connect the pieces using corner connectors or screws, forming the base and vertical supports. Ensure each joint is tight and stable. Use a level to keep everything aligned as you assemble. To help visualize, here’s a simple guide:
| Step | Material Needed | Key Tip |
|---|---|---|
| Connect base | PVC pipes or wood | Keep it square and level |
| Attach verticals | Same as base | Secure tightly |
| Finalize frame | Connectors or screws | Double-check stability |
Once assembled, double-check all connections before moving on. Incorporating sturdy materials and proper assembly techniques can improve the durability and stability of your air quality setup. Additionally, following building guidelines can ensure your booth remains safe and effective over time. Regular inspection and maintenance are also recommended to prolong the lifespan of your DIY vocal booth. For added stability, consider using quality fasteners to prevent any loosening over time.
Reinforcing Structural Integrity
Ensuring your vocal booth’s frame is sturdy is essential for effective sound isolation and durability. A strong structure prevents vibrations and unwanted noise leaks, keeping your recordings clean. To reinforce your frame, consider adding cross-bracing or diagonal supports, which enhance stability. Use high-quality screws and brackets to secure joints tightly. Double-check that all corners are square and level before moving forward. Additionally, applying foam tape or sealant at joints can reduce vibrations and noise transfer. Remember, a well-supported frame minimizes movement and sagging over time, ensuring your booth remains effective. Incorporating structural support and industry trends into your design can also help optimize soundproofing and functionality. Paying attention to structural integrity ensures your DIY booth remains durable and effective over the long term. Incorporating materials with vibration dampening properties can further improve sound isolation and prevent structural fatigue.

VEVOR Sound Dampening Blanket, 96" x 80", Extra Large Studio Grommeted Blanket with Grommets, Light Blocker for Door Acoustic Noise Blocking Blanket Studio Sound Absorption Sheet, Black
Wrap It Up in a Snap: Wrap it all up in our massive 96" x 80" sound dampening…
As an affiliate, we earn on qualifying purchases.
As an affiliate, we earn on qualifying purchases.
Soundproofing and Acoustic Treatment

Soundproofing and acoustic treatment are essential steps to create a professional-sounding vocal booth. To reduce noise leaks, seal gaps around doors and windows with weatherstripping or foam tape. Adding mass to walls, like dense blankets or foam panels, helps block sound transmission. For acoustic treatment, focus on controlling reflections inside your booth; hang foam panels or DIY sound diffusers on the walls to absorb echoes. Position bass traps in corners to manage low-frequency issues. Avoid overdoing it—aim for a balanced environment that minimizes outside noise without making the space sound too dead. Remember, effective soundproofing prevents sound from escaping, while acoustic treatment improves clarity and reduces unwanted reverberations. Combining these strategies ensures you record clean, professional-quality vocals in your DIY booth. Additionally, consider the importance of sound absorption, which helps create a more controlled acoustic environment for better vocal clarity. Proper soundproofing techniques can further enhance your setup by preventing external noise from infiltrating your recordings.
Assembling and Finishing Touches

Once you’ve set up your soundproofing and acoustic treatments, it’s time to assemble the components of your vocal booth and add finishing touches that enhance both functionality and comfort. Begin by carefully connecting panels or framing, ensuring they stay secure and stable. Next, install any doors or ventilation to maintain airflow without compromising soundproofing. Add cushioning or padding to edges for comfort during long recordings. Consider placing a small shelf for your microphone or accessories. Finally, customize your space with personal touches like a chair, lighting, or decorative elements to make it inviting. To help you get started, here are some key finishing steps:
Secure panels, add comfort, and personalize your vocal booth for a perfect recording space.
- Secure all panels firmly
- Install weatherstripping or seals
- Add a comfortable, adjustable chair
- Incorporate soft lighting
- Place a microphone stand or holder
Setting Up Your Recording Space

Choosing the right location is essential for your recording space, so pick a spot with minimal noise and good natural light. Once you’ve found it, arrange acoustic treatments like foam panels or bass traps to reduce echo and improve sound quality. These steps set the foundation for clear, professional recordings.
Choosing the Ideal Location
Finding the right spot for your DIY vocal booth is essential to achieving clear, professional-quality recordings. You want a space that minimizes noise and distractions while providing good acoustics. Look for an area away from busy household traffic, appliances, or windows that let in external noise. Avoid rooms with hard, reflective surfaces that cause echo, unless you plan to treat them later. Choose a corner or closet with enough space to set up your booth comfortably. Ensure there’s easy access to power outlets and a stable surface for your equipment. Also, consider the room’s size—smaller spaces often work better for sound isolation. Prioritize a quiet, low-traffic area to help your recordings sound polished and professional.
Arranging Acoustic Treatments
To achieve professional-quality recordings, you need to carefully arrange acoustic treatments within your vocal booth. Start by placing foam panels at ear level around your recording area to absorb reflected sound. Position bass traps in the corners to control low-frequency build-up. Use diffusers or additional panels on the back wall to prevent sound from bouncing back into your microphone. Keep your microphone at the center of the treated space, avoiding direct contact with untreated surfaces. Make sure there’s enough space between you and the walls to minimize echoes. Adjust the placement of panels as needed to reduce standing waves and flutter echoes. Regularly listen critically and make small tweaks to optimize sound quality, creating a balanced, acoustically friendly environment.
Frequently Asked Questions
Can I Customize the Size of My DIY Vocal Booth?
Yes, you can customize the size of your DIY vocal booth. You just need to plan carefully and measure your space. Use adjustable materials like lightweight panels or curtains to expand or shrink the booth as needed. Keep in mind that larger booths may require more soundproofing and sturdy support. With some creativity and planning, you can create a personalized space that fits your needs and budget.
What Are the Best Budget-Friendly Soundproofing Materials?
You should consider budget-friendly soundproofing materials like moving blankets, thick curtains, and foam panels. Moving blankets are affordable and easy to hang, effectively reducing echo. Thick curtains can block noise when placed over doors and windows. Foam panels are lightweight, easy to install, and absorb sound well. Combining these options helps you create an effective, budget-conscious vocal booth without sacrificing sound quality.
How Do I Prevent Echoes Inside the Booth?
Echoes can turn your recording space into a concert hall, but don’t worry! You gotta treat your booth like a cozy cave—use thick blankets, foam panels, or even pillows to absorb sound. Stick them around the walls, ceiling, and corners. Seal any gaps with weatherstripping or duct tape. These simple tricks will trap sound waves, making your recordings crisp, clear, and echo-free—like you’re singing in a professional studio!
Is It Necessary to Ventilate the Vocal Booth?
Ventilating your vocal booth is important to keep fresh air circulating, especially during long recording sessions. Without proper ventilation, you might feel stuffy or uncomfortable, which can affect your performance. You don’t need a complex system; simple options like a small fan or a vent opening can suffice. This guarantees you stay comfortable and focused, maintaining good airflow without compromising soundproofing or budget.
Can I Move or Disassemble the Booth Easily?
You’ll find that a DIY vocal booth is usually designed for easy movement and disassembly. If you use lightweight materials like foam panels and a simple frame, you can quickly dismantle or relocate it. Just make sure all parts are securely attached but not permanently fixed. This way, you can enjoy flexibility without sacrificing sound quality, making it perfect for changing spaces or storing when not in use.
Conclusion
Building a DIY vocal booth for under $150 is entirely doable and can markedly improve your recordings. Did you know that proper acoustic treatment can reduce background noise by up to 80%? By carefully planning, choosing budget-friendly materials, and paying attention to soundproofing, you’ll create a professional-sounding space without breaking the bank. Your voice deserves the best, and now you have the tools to make it sound crystal clear—on a budget.