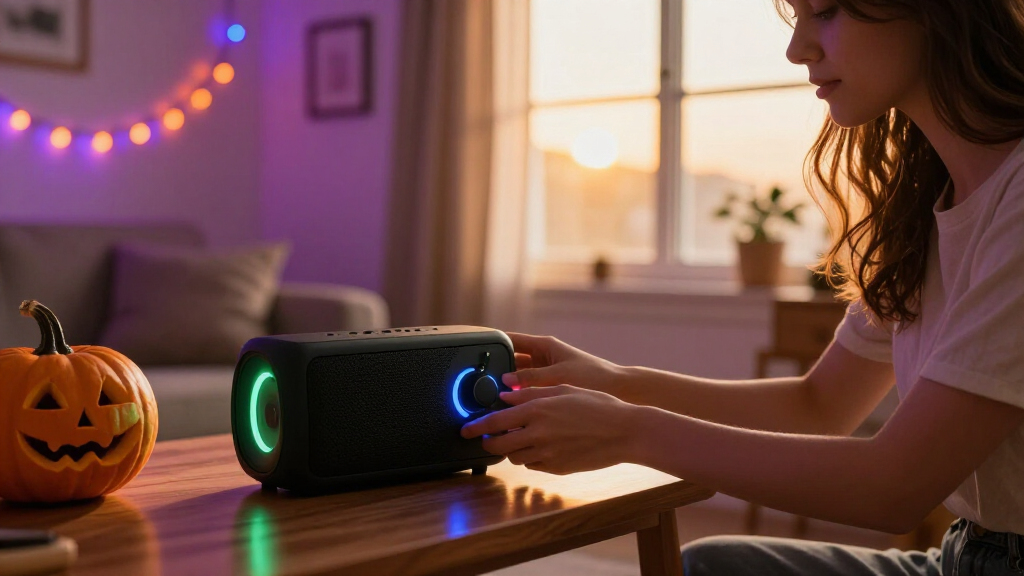

This guide shows you how to build a pair of Halloween speakers wrapped in LED strip lights that react to sound. When a spooky track, a scream effect, or a doorbell chime plays through the speakers, the LEDs pulse, flash, and shift color in time with the noise. The result is a self-contained prop: plug it in, play your Halloween playlist from a phone, and the lights dance along automatically with no programming or manual control required.

Get audio and creator gear delivered free — and shop member deals
- Fast, free delivery on millions of items
- Access to Prime Big Deal Days deals on October 6–7
- Prime Video, Amazon Music and more included

TelleglowW 4-Pack Halloween Horror Sound Effects Box with LED Light
- ✔ Quantity: 4 sound boxes
- ✔ Trigger: Sound-activated (dual high-sensitivity sensors)
- ✔ Lighting: LED light

Seenelling 4-Pack Halloween Motion Sensor Scare Sound Units
- ✔ Quantity: 4 units
- ✔ Trigger: Motion sensor
- ✔ Features: Spooky sound effects, color-changing LED lights

2 Pack Halloween Sound Effects Box with LED Lights, Battery-Powered Voice-Activated Horror Sound Player
- ✔ Quantity: 2 pack
- ✔ Power Source: 3 AAA batteries (not included)
- ✔ Trigger Type: Sound sensor (voice-activated)
This project is for hobbyists with basic soldering skills and some familiarity with simple DC wiring. No coding is needed — the sound sensor module does all the reactive work on its own. If you can strip wires, solder a joint, and use a glue gun safely, you can finish this in a single afternoon. Total build time is 2 to 4 hours depending on how decorative you want the final enclosure to look.
The core components are a powered speaker set (either a small amplified speaker pair or a Bluetooth amp board with passive speakers), an analog LED strip, a sound sensor module with a built-in microphone, a power supply, and a decorative enclosure such as a plastic skull, tombstone, or painted box. The finished unit runs from one wall outlet.
Difficulty: Intermediate | Time: 2-4 hours (plus shopping time for parts)
What You’ll Need
Tools & Materials:
- Soldering iron and solder
- Wire strippers
- Hot glue gun and glue sticks
- Multimeter (for voltage checks)
- Small Phillips screwdriver
- Electrical tape or heat-shrink tubing and a heat source
- Scissors or hobby knife
- Drill with small bits (for enclosure wiring holes)
Knowledge:
- Basic soldering of wire joints
- How to identify positive and negative DC wires
- Safe handling of low-voltage DC power
- Basic familiarity with a multimeter for checking voltage
Order parts in advance if buying online. Verify the voltage of every component before purchase: the simplest build runs everything (amplifier and LEDs) from a single 12V DC power supply. If you use a 5V Bluetooth amp board, you will need a 5V buck converter to step 12V down for it, or use a 5V LED strip and a matching 5V supply. Mixing voltages without a converter is the most common cause of dead components in this project.
All work in this guide happens on the low-voltage DC side. The only mains-connected part is the sealed power adapter, which you should never open.
TelleglowW 4-Pack Halloween Horror Sound Effects Box with LED Light
The TelleglowW 4-Pack earns our top spot because it removes nearly every friction point in this category. The dual high-sensitivity sensors matter more than they sound: in a category where cheap sound triggers either miss footsteps or fire constantly, twin sensors mean the box reliably catches nearby noise without needing someone to shout at it. Compared with the 2 Pack’s single-sensor design, this model is the one we’d trust in a busy haunted house where the trigger needs to fire on cue.The second differentiator is convenience. Batteries are included and no wiring is required, so all four boxes work straight out of the package — a genuine advantage over both competitors, which either ship without batteries or don’t specify them at all. At roughly 2.4 x 2 x 1 inches per unit, they hide easily inside props, though the shorter cable than the 2 Pack limits placement slightly if you’re threading them through a large inflatable.The tradeoff is baked into the design: you’re limited to the built-in horror sound effects with no customization, and running four boxes on triple-A batteries each means eventual replacement costs. But for plug-and-play reliability across a full display, this pick makes the most sense.
Pros:
- Dual high-sensitivity sensors trigger reliably on nearby sound
- Batteries included — genuinely ready to use out of the box
- Four compact units cover a large display or multiple rooms
- No wiring required for indoor or outdoor placement
Cons:
- Limited to built-in horror effects with no customization
- 12 AAA batteries total will need eventual replacement
- Shorter cable than the 2 Pack for larger inflatables
Best for: Haunted house builders and party hosts who want four reliable, ready-to-run sound-activated scare boxes without any setup hassle.
Not ideal for: Buyers who want distinct sound variety across units or customizable audio — all four boxes play the same built-in effects.
Bottom line: The most dependable and convenient sound-activated option in this lineup, and the one we’d put at the entrance of a haunted house.
“The most dependable and convenient sound-activated option in this lineup, and the one we’d put at the entrance of a haunted house.”
Seenelling 4-Pack Halloween Motion Sensor Scare Sound Units
Where the TelleglowW listens for sound, the Seenelling units watch for movement — and that difference defines who should buy them. Motion triggering is the smarter choice in noisy environments: at a packed Halloween party where music and chatter would keep sound-activated boxes firing nonstop, these units stay quiet until someone actually walks past. If your display lives near a speaker or a busy street, this is the pick that won’t false-trigger all night.Value is the other story here. You get four units for the price of smaller sets, each with spooky sound effects and color-changing LED lights — the only option in this lineup with shifting colors rather than a fixed LED. At just 2.36 x 1.89 x 1.02 inches, they’re the smallest units we looked at, slipping into bushes, under furniture, or inside tight props where the TelleglowW’s slightly larger boxes might show. Tool-free mounting means you can reposition them mid-party without tools or adhesives.The honest drawbacks: there’s no volume control mentioned, so you can’t dial the scares down for indoor use, and the battery type and life go unspecified — an annoyance the battery-included TelleglowW neatly avoids. This model is better suited to outdoor perimeter scares than precise haunted-house choreography.
Pros:
- Four units per pack — best coverage per dollar in this lineup
- Motion trigger avoids false alarms in noisy party settings
- Color-changing LEDs unique among these options
- Tool-free mounting for quick repositioning
Cons:
- No volume control or sound customization mentioned
- Battery type and battery life not specified
- Motion sensors need line-of-sight placement, unlike sound triggers
Best for: Budget-conscious decorators covering a large yard or walkway who want motion-triggered scares in noisy environments.
Not ideal for: Anyone who needs volume control, sound customization, or clarity on long-term battery costs.
Bottom line: The coverage-per-dollar winner, ideal for noisy outdoor setups where motion triggering beats sound activation.
“The coverage-per-dollar winner, ideal for noisy outdoor setups where motion triggering beats sound activation.”
2 Pack Halloween Sound Effects Box with LED Lights, Battery-Powered Voice-Activated Horror Sound Player
This two-pack takes the opposite philosophy from the four-packs: fewer boxes, but two genuinely different effects — one unit produces ghostly howls while the other delivers a witch’s wild laughter. Placed at opposite ends of a porch scene, they create a layered soundscape that four identical boxes can’t replicate. For decorators who care about atmosphere and narrative rather than sheer coverage, this distinction is the whole point.Its high-sensitivity sound sensors fire instantly on nearby voices, matching the TelleglowW’s responsiveness in quiet settings. The 9.84-inch cable and lightweight ABS body make hiding units inside pumpkin lanterns, skulls, and inflatables straightforward, and the build quality holds up for outdoor use. Compared with the Seenelling, this option trades quantity for character — two curated scares rather than four generic ones.Two drawbacks keep it from ranking higher. The batteries are not included, so factor in a pack of AAAs before the big night, and each unit requires manual switch activation rather than fully automatic operation — you’ll need to physically turn them on, which matters if your props are placed somewhere hard to reach. It’s a focused tool for a focused display, not a whole-house solution.
Pros:
- Two different effects (ghost howls and witch laughter) for layered scares
- High-sensitivity sound sensors trigger instantly on voices
- Compact and lightweight for hiding in pumpkins, skulls, and inflatables
- Durable ABS construction for indoor and outdoor use
Cons:
- Batteries not included
- Requires manual switch activation rather than fully automatic operation
- Only two units — limited coverage compared to the four-packs
Best for: Decorators building a small, curated scene who want two distinct, contrasting scare effects rather than duplicate units.
Not ideal for: Large displays needing broad coverage, or anyone wanting fully automatic operation without manual switching.
Bottom line: The best choice for a crafted, two-scare scene where distinct sounds matter more than unit count.
“The best choice for a crafted, two-scare scene where distinct sounds matter more than unit count.”
As an Amazon Associate we earn from qualifying purchases.
Before You Start
Test every component individually before assembling anything. Power the speaker or amp from its intended supply and confirm it plays audio. Connect a short section of LED strip to the correct supply voltage and confirm it lights. Connect the sound sensor module and confirm its indicator LED responds when you clap near the microphone. Finding a dead part now saves an hour of disassembly later.
Work in a well-ventilated area when soldering, and let the iron rest in its stand whenever it is not in use. Plan your wiring layout on paper first: decide where the microphone sits (it must be exposed to open air, not buried inside foam), where the LED strip runs, and where the power cable exits the enclosure.
Avoid the temptation to run LED strips directly off the amplifier’s speaker output. Speaker outputs carry a varying AC signal that will destroy standard 12V or 5V LED strips. The sound sensor module exists precisely so the LEDs can share a clean DC supply while still reacting to audio.
Step-by-Step Instructions
Step 1: Prepare the enclosure and mark component positions
Place the speakers, sound sensor, and power entry point in their planned positions on or inside your enclosure. Mark with a pencil where the LED strip will run, where the microphone will sit, and where the power cable will exit. Drill any holes needed for wires now, while the enclosure is empty and easy to handle.
Tip: Keep the microphone at least 6 inches from a speaker driver. Too close and bass vibrations trigger constant flicker instead of sound-reactive pulsing.
Check: You can visually trace the full planned path of the LED strip and wiring without any crossing or pinched sections.
Step 2: Mount the sound sensor module
Glue the sound sensor module inside the enclosure with hot glue, positioning the microphone hole facing outward through a small opening or gap. Route its three signal wires (VCC, GND, OUT) back toward your wiring point. Position the sensitivity trimmer potentiometer, if present, so it remains accessible for later adjustment with a small screwdriver.
Tip: Cover the module in a small plastic bag or tape before gluing nearby decorations so hot glue and paint spray do not block the microphone hole.
Check: When powered later, the module’s onboard LED flickers when you speak or clap near the enclosure.
Step 3: Attach the LED strip to the enclosure
Press the LED strip firmly along your marked path in short sections after peeling the adhesive backing. Cut the strip only at the marked cut lines between segments. Bridge sharp corners by cutting at the line and soldering short jumper wires across the pads instead of forcing a bend. Solder two supply wires (12V positive and ground) to the beginning of the strip’s input pads.
Tip: Clean the enclosure surface with rubbing alcohol first. The factory adhesive fails quickly on dusty or painted-then-handled plastic, and a loose strip will droop by Halloween night.
Check: The strip lies flat along its entire path with no peeling corners, and the input wires are soldered securely to the correct +12V and GND pads.
Step 4: Wire the sound-triggered switching circuit
Connect the LED strip’s positive supply line to the sound sensor module’s OUT pin through the switching path. Wire the 12V positive line through the switched terminals of the sound-triggered relay or MOSFET driver module if your kit includes one: attach 12V supply positive to the module’s common input, then attach the module’s switched output to the LED strip positive. Connect the sensor’s VCC to your supply’s positive rail, and join all grounds — sensor, LED strip, amplifier, and power supply — together at a single common ground point.
Tip: The common ground connection is what makes the sensor and LEDs cooperate. If you skip it, the LEDs may glow dimly at all times or fail to react. Twist all ground wires together and solder them into one joint.
Check: A continuity check with your multimeter shows zero resistance between every ground wire and the power supply’s negative terminal.
Wire the power supply’s positive and negative outputs to the amplifier’s power input, observing polarity. Verify that the amplifier, LED circuit, and sensor all draw from the same supply rail, routing through the buck converter if your amp board needs 5V. Solder every joint and insulate it with heat-shrink tubing or electrical tape. Route all wires through the drilled exit hole and secure them with hot glue strain relief so tugs on the cable do not pull connections loose.
Tip: Check your power supply’s current rating. Add the LED strip’s amp-per-meter rating (printed on the reel) to the amplifier’s maximum draw. A 2A supply is usually enough for a small build; undersized supplies cause flickering and audio distortion.
Check: Before final gluing, all solder joints are covered and no bare copper is visible anywhere in the wiring.
Step 6: Test the full system before decorating
Plug in the power supply, pair or connect your audio source, and play a Halloween sound effect at typical display volume. Watch the LED strip while the sound plays, and turn the sensor module’s sensitivity trimmer slowly with a small screwdriver until the lights pulse clearly on sound peaks without flickering during silence.
Tip: Test at the volume you will actually use on Halloween night. Sensitivity set at low volume will overload when you crank it up.
Check: The LEDs stay fully off during silence and flash in time with loud passages of audio at your chosen volume.
Step 7: Seal and decorate the enclosure
Glue the wiring bundle neatly inside the enclosure with hot glue, leaving the sensor’s trimmer reachable. Close the enclosure, then decorate around — not over — the LEDs and microphone. Attach mesh, spider webs, or paint while keeping the LED faces and microphone hole unobstructed.
Tip: Do not paint over the LED strip. Even a thin coat of spray paint cuts brightness dramatically and cannot be removed.
Check: A final sound test after decoration shows the LEDs flashing at the same brightness and responsiveness as the pre-decoration test.
Common Mistakes to Avoid
- Powering the LED strip from the speaker output instead of the DC supply — Always feed LEDs from the regulated DC power supply, switched by the sound sensor’s driver module. Speaker-level signals will burn out a standard strip instantly.
- Mixing 5V and 12V components without a buck converter — Write down the voltage of each part before wiring. If they differ, add a step-down converter rated for the amp board’s current draw.
- Burying the microphone inside foam or decorations — Mount the sensor so the microphone hole faces open air, and retest sound response after every decoration addition.
- Undersized power supply causing flicker and audio distortion — Add up the LED strip and amplifier current ratings and choose a supply with at least 25% headroom.
Troubleshooting
Problem: LEDs stay on constantly instead of reacting to sound
Solution: Turn the sensitivity trimmer counterclockwise until the lights go dark during silence. If that has no effect, check that the sensor’s OUT wire actually connects to the driver module’s input, and confirm the common ground joint is intact.
Problem: LEDs do not light at all
Solution: Measure the voltage at the LED strip’s input pads with a multimeter. If no voltage appears during sound, test the driver module by briefly jumpering its switched terminals — if the LEDs light, the sensor or its wiring is faulty. If voltage is present but the strip is dark, check polarity and inspect the first solder joint on the strip.
Problem: Audio plays but sounds distorted at higher volume
Solution: The power supply is likely overloaded or the amplifier is underpowered for the speakers. Upgrade to a higher-current supply, or reduce LED strip length to cut the load.
Problem: Lights flicker randomly with no sound playing
Solution: The microphone is probably picking up vibration or electrical noise. Relocate the sensor away from speaker drivers, shorten its signal wire, and make sure it shares the single common ground point rather than a daisy-chained ground.
What Success Looks Like
The finished prop passes this checklist: plugging in a single power cable starts the system; audio plays clearly through both speakers at display volume; the LEDs remain completely dark during silence; the LEDs pulse and flash in time with loud sounds and music; the sensitivity can still be adjusted without opening the enclosure; and the unit runs continuously for at least 30 minutes without flicker, hum, or warm components. If all of these hold, the build is complete and display-ready.
Next Steps
Let the unit run for a full hour indoors before installing it outdoors to catch any heat or wiring issues early. If displaying outside, place the enclosure under a covered porch or in a sealed plastic bin with a cable gland for the power cord — none of these components are weatherproof. When Halloween ends, unplug and store the unit indoors; LED strips and sensors survive years of reuse if kept dry. For a future upgrade, replace the sound sensor with a microcontroller and addressable LED strip to add color patterns, remote control, or beat-detection modes.
Frequently Asked Questions
Do I need to program anything for the lights to react to sound?
No. The sound sensor module and its driver detect noise and switch the LEDs entirely on their own. Programming is only needed if you later upgrade to a microcontroller for custom patterns.
Can I use a Bluetooth speaker I already own instead of building in an amplifier?
Yes. Keep the Bluetooth speaker intact and build only the LED circuit with its own power supply. The sensor’s microphone hears the speaker’s output and flashes the LEDs in response, so no internal wiring to the speaker is needed.
Why do the LEDs flash to my voice and footsteps but not to the music?
The sensitivity is set too high, so quiet constant sounds saturate the sensor. Turn the trimmer down until the lights stay off during normal room noise, then set your music at the volume you will use on display night.
How many LEDs can one power supply drive?
Check the amp-per-meter figure printed on the strip reel, multiply by your strip’s length, and keep the total under about 80% of the supply’s rating after adding the amplifier’s draw. For example, a 2A supply safely runs roughly 1 to 1.5 meters of typical strip plus a small amplifier.
Is it safe to leave this running all evening?
Yes, provided the supply is not overloaded and all joints are insulated. Do the one-hour indoor test first, and touch-check the power adapter — warm is normal, hot enough that you cannot keep a hand on it means the load is too high.
Fall Picks
fall essentials
As an affiliate, we earn on qualifying purchases.